Settings
This page covers how to configure key system settings to tailor the Revolut POS system to your business needs. These settings include tax rates, service charges, and receipt customisation.
The main Settings page gives you quick access to key configuration options for your POS system. To open it, your profile icon in the top right corner, then select Settings.
Store
In the Store menu configure key business details and order fulfillment options to streamline your store's locations.
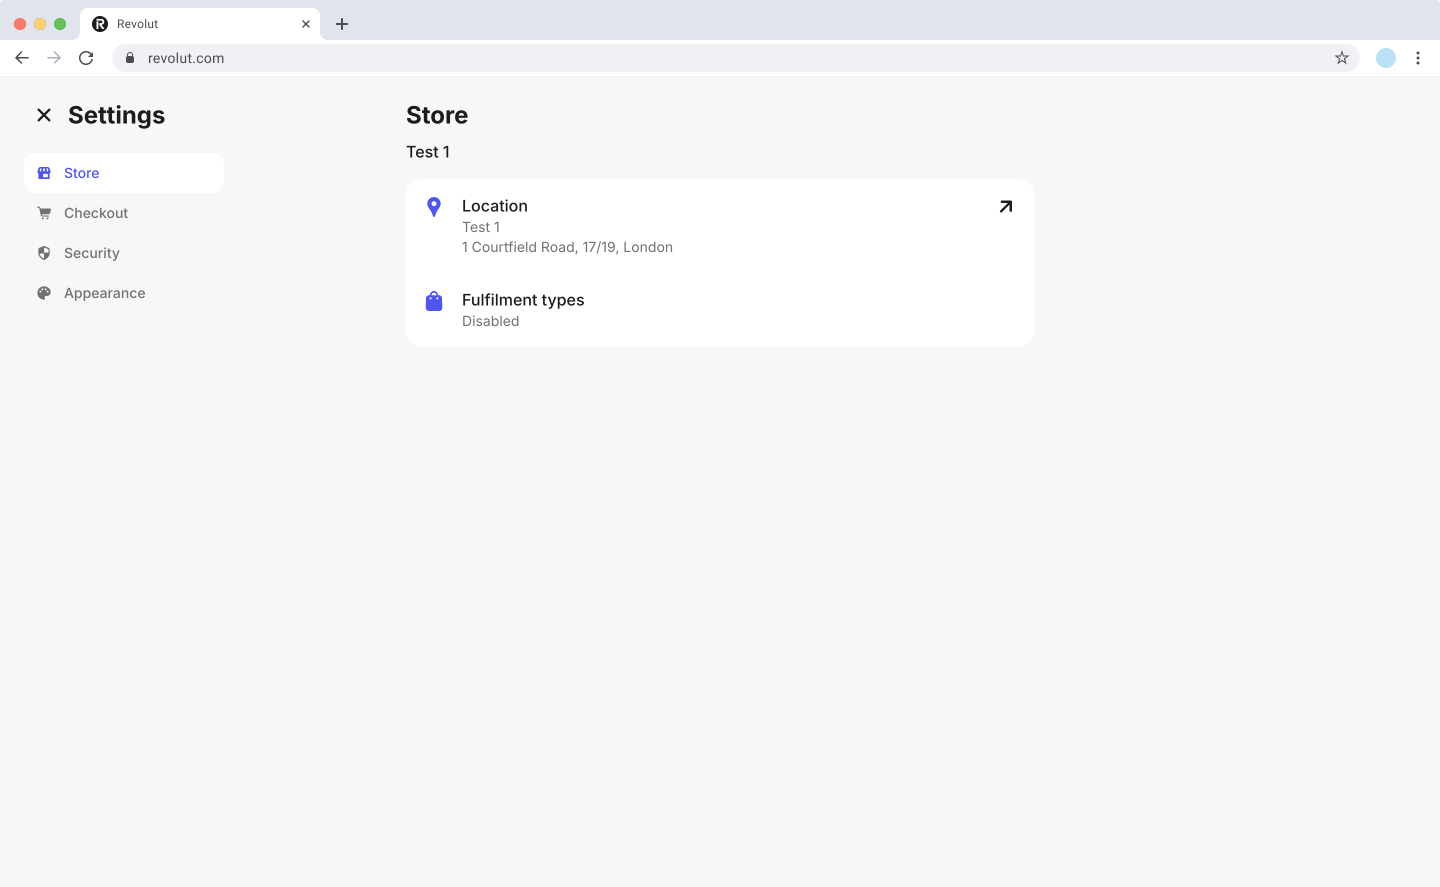
- Location: Displays your business name and address.
- Fulfilment types: Enable eat-in or takeaway order types. Orders use takeaway pricing when set for specific products.
Checkout
In the Checkout menu, you can enable the service charge with a set percentage, configure tax rates, and customise receipts.
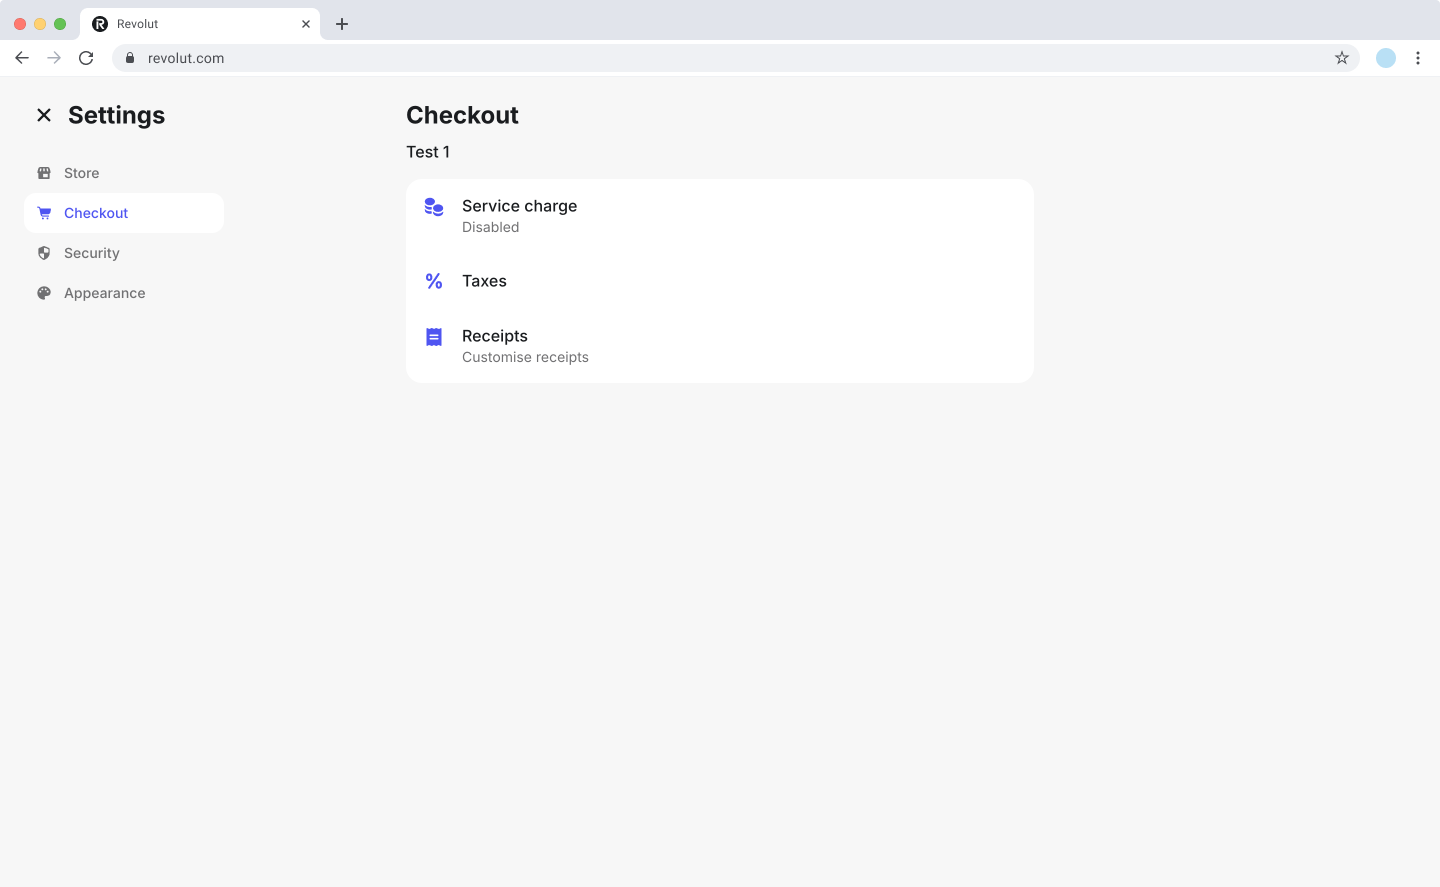
- Service charge: Enable or disable applying a fixed service charge percentage to all orders. When enabled, you can define the specific rate to be automatically added during checkout.
- Taxes: Manage and customise tax rates that can be applied to products and orders. Set up different rates based on your business requirements and local tax regulations.
- Receipts: Customise receipt appearance to enhance your brand presence and meet business requirements. Add your logo, business details, and custom messages to create professional receipts that help with record-keeping and customer service.
Service charge
The service charge feature allows you to automatically apply a fixed percentage charge to all orders. This is particularly useful for businesses that want to include gratuity or additional service fees in their transactions.
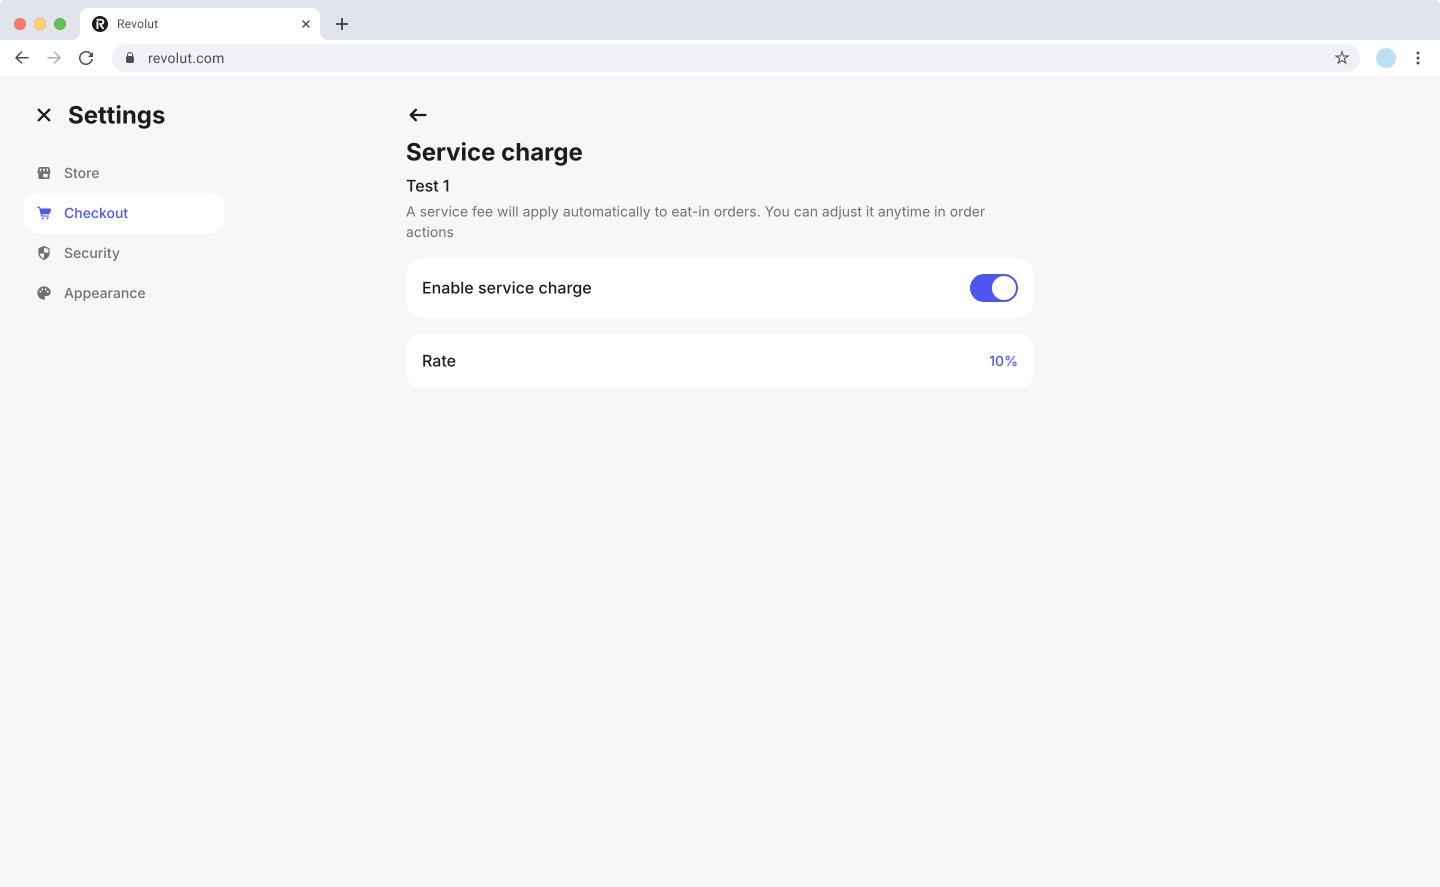
To set up a service charge:
- Click your profile icon and select Settings.
- Go to Checkout > Service charge.
- Toggle the switch to enable service charges.
- Enter the percentage rate you want to apply to all orders.
The service charge will be automatically added to all orders during checkout once enabled.
Taxes
Tax rates allow you to set up and manage different tax percentages that can be applied to your products and transactions. You can configure multiple tax rates to accommodate different product categories or service types, helping ensure compliance with local tax regulations. These rates are automatically calculated and added to orders during checkout.
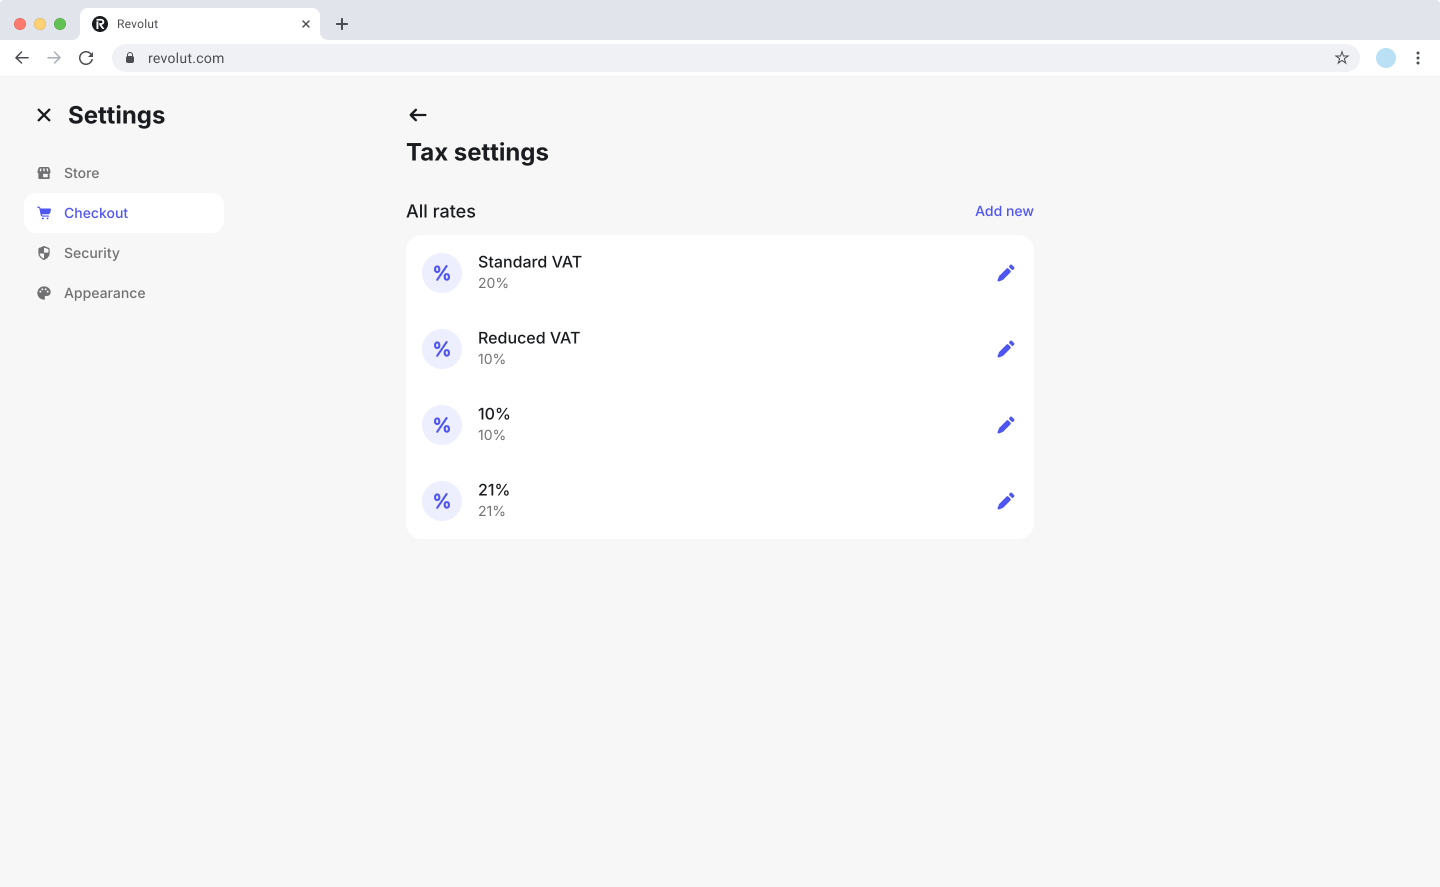
Revolut does not determine if taxes apply to your transactions and is not responsible for reporting or remitting any taxes on your behalf.
To manage tax rates:
- Click your profile icon and select Settings.
- Go to Checkout > Taxes.
- From here you can:
- Add a new tax rate: Click Add new, enter a name (e.g., "VAT 20%") and the tax rate percentage, then click
Save. - Edit a tax rate: Click the icon next to the rate, update the details, and click
Save. - Delete a tax rate: Click the icon next to the rate, then click Delete and confirm your choice.
Deleting a tax rate will remove it from all associated products.
Receipts
Customise the receipts issued to customers to include your branding and business details.
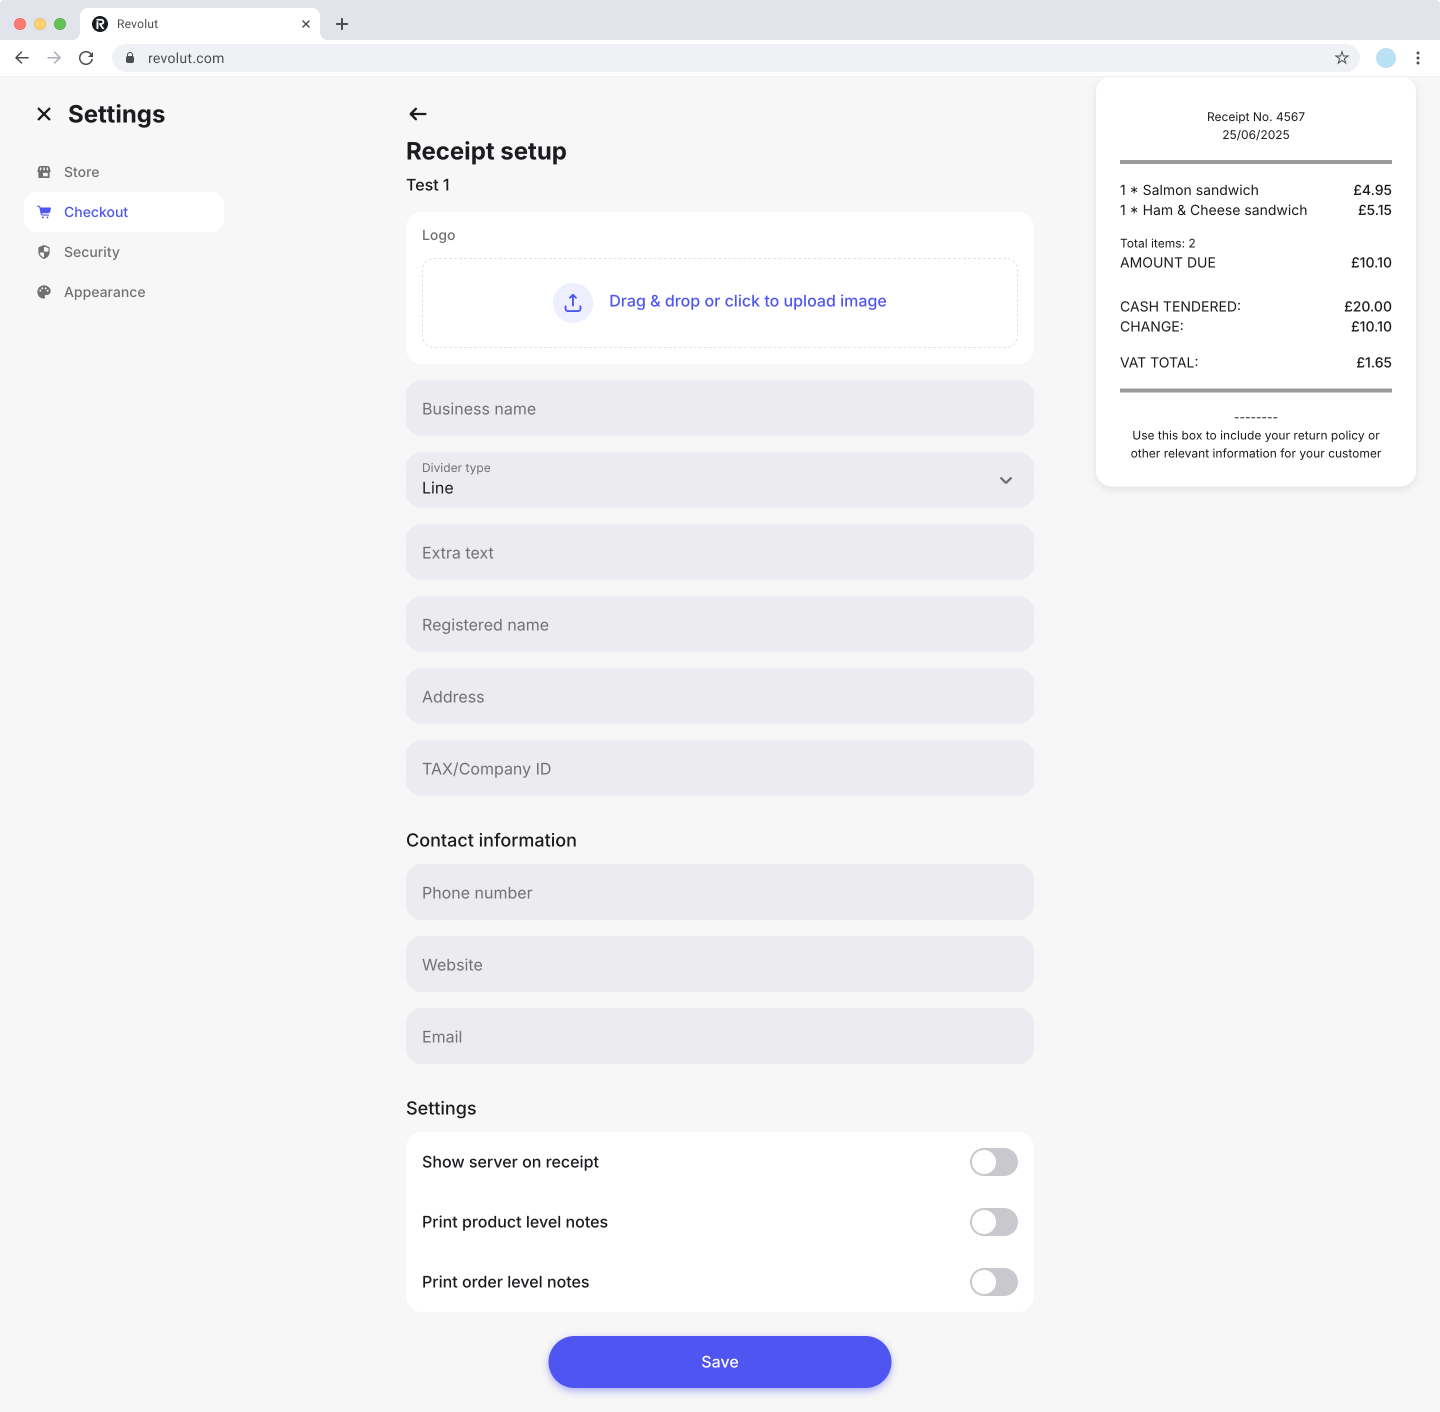
To customise your receipts:
- Click your profile icon and select Settings.
- Go to Checkout > Receipts.
- Update the following fields to provide general store details:
- Logo: Upload or remove your business logo to display at the top of the receipt.
- Business name: The name of your business.
- Divider type: Select how sections are divided.
- Extra text: Add additional information, such as return and refund policy, promotional messages, etc.
- Registered name: The legal name of your business.
- Address: Your business's location.
- TAX/Company ID: Your business's tax or company registration details.
- Contact information:
- Phone number: Your business's contact number.
- Website: A URL to your website.
- Email: A contact email address your customers can use.
- Adjust Quick settings:
- Show server on receipt: Enable this option to include the server's name on the receipt.
- Print item-level notes: Enable this option to print notes added to individual items.
- Print bill-level notes: Enable this option to print notes added to the overall bill.
- Click Save to apply your changes.
As you make changes, the receipt preview updates in real-time to show how your customisations will appear to customers. This allows you to review the formatting and content before saving.
Security
In the Security menu, you can enable automatic screen locking after each completed transaction for enhanced security.
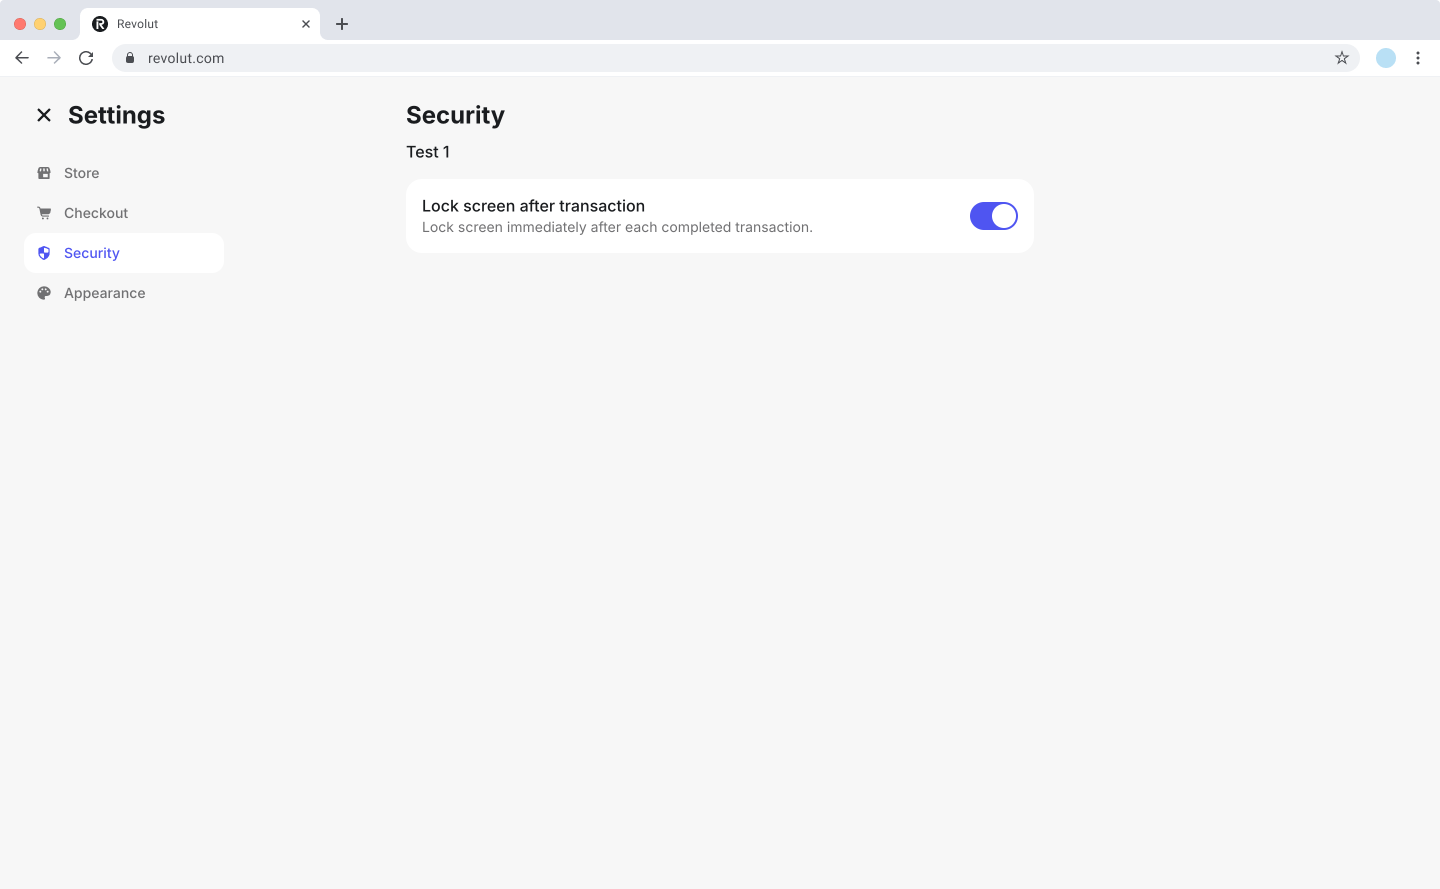
To enable automatic screen locking:
- Click your profile icon and select Settings.
- Go to Security.
- Toggle Lock screen after transactions to enable or disable this feature.
When enabled, the screen will automatically lock after each completed transaction, requiring authentication to process the next sale.
Appearance
In the Appearance menu, customise the visual theme and language settings of your POS web portal.
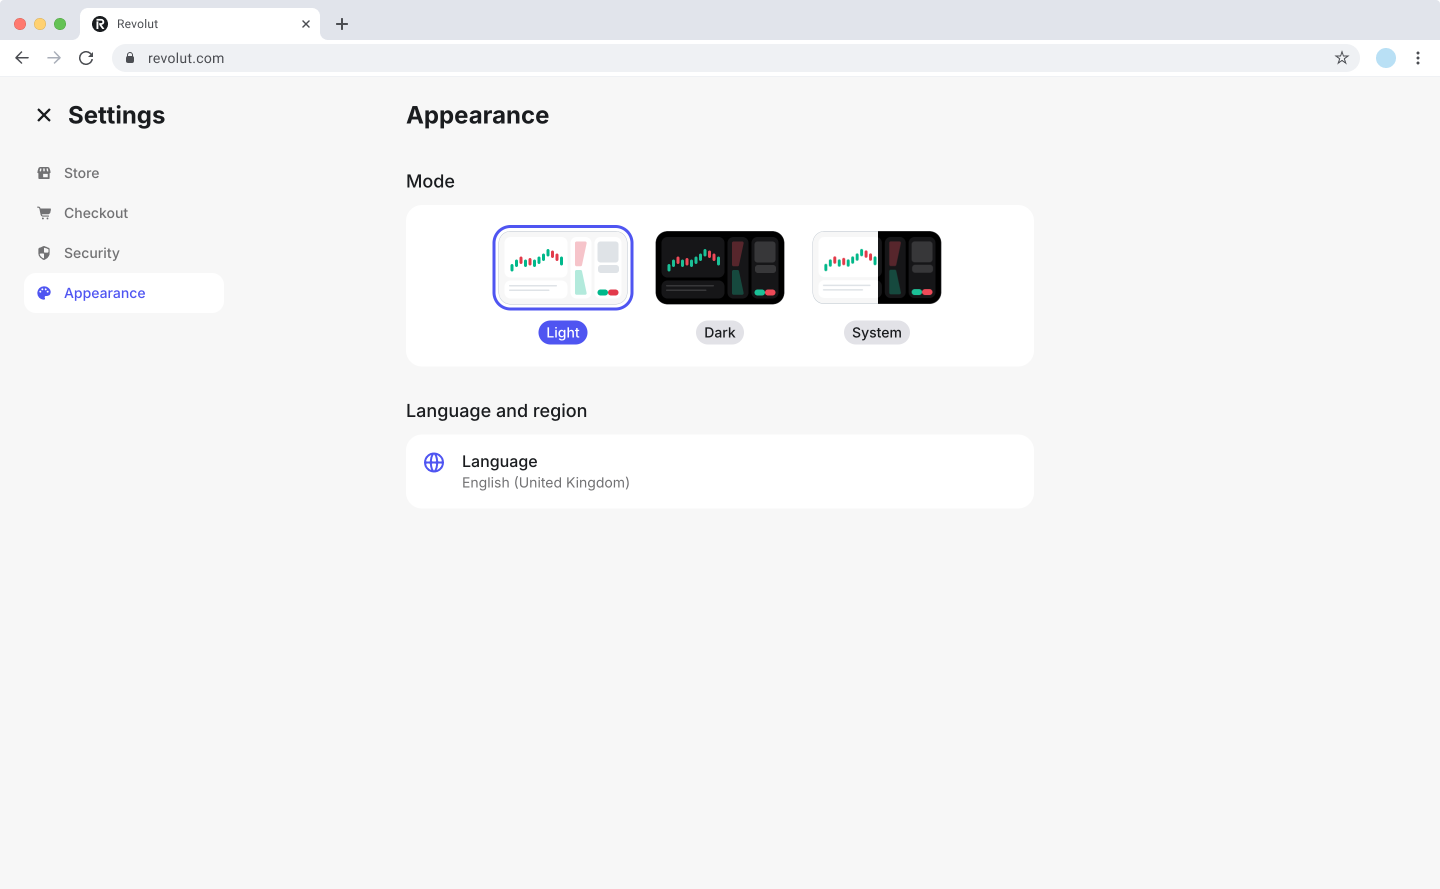
To adjust appearance settings:
- Click your profile icon and select Settings.
- Go to Appearance.
- Configure the following options:
- Mode: Choose between Light, Dark, or System mode for the colour scheme.
- Language and region: Select your preferred language for the POS web portal interface.
- Changes are applied automatically when you select an option.