
Add the Revolut Pay button to your app, confirm payment results in your UI, and fulfil orders on authoritative webhooks.
Revolut Pay allows your customers to pay with their card or their Revolut Retail or Revolut Business account, delivering a streamlined checkout experience through your React Native application.
In this tutorial, we'll guide you through integrating Revolut Pay Lite, powered by the Revolut Pay SDK for React Native. The SDK handles the entire payment flow, including redirecting to the Revolut app when installed and falling back to a secure in-app WebView, reducing friction and improving conversion rates.
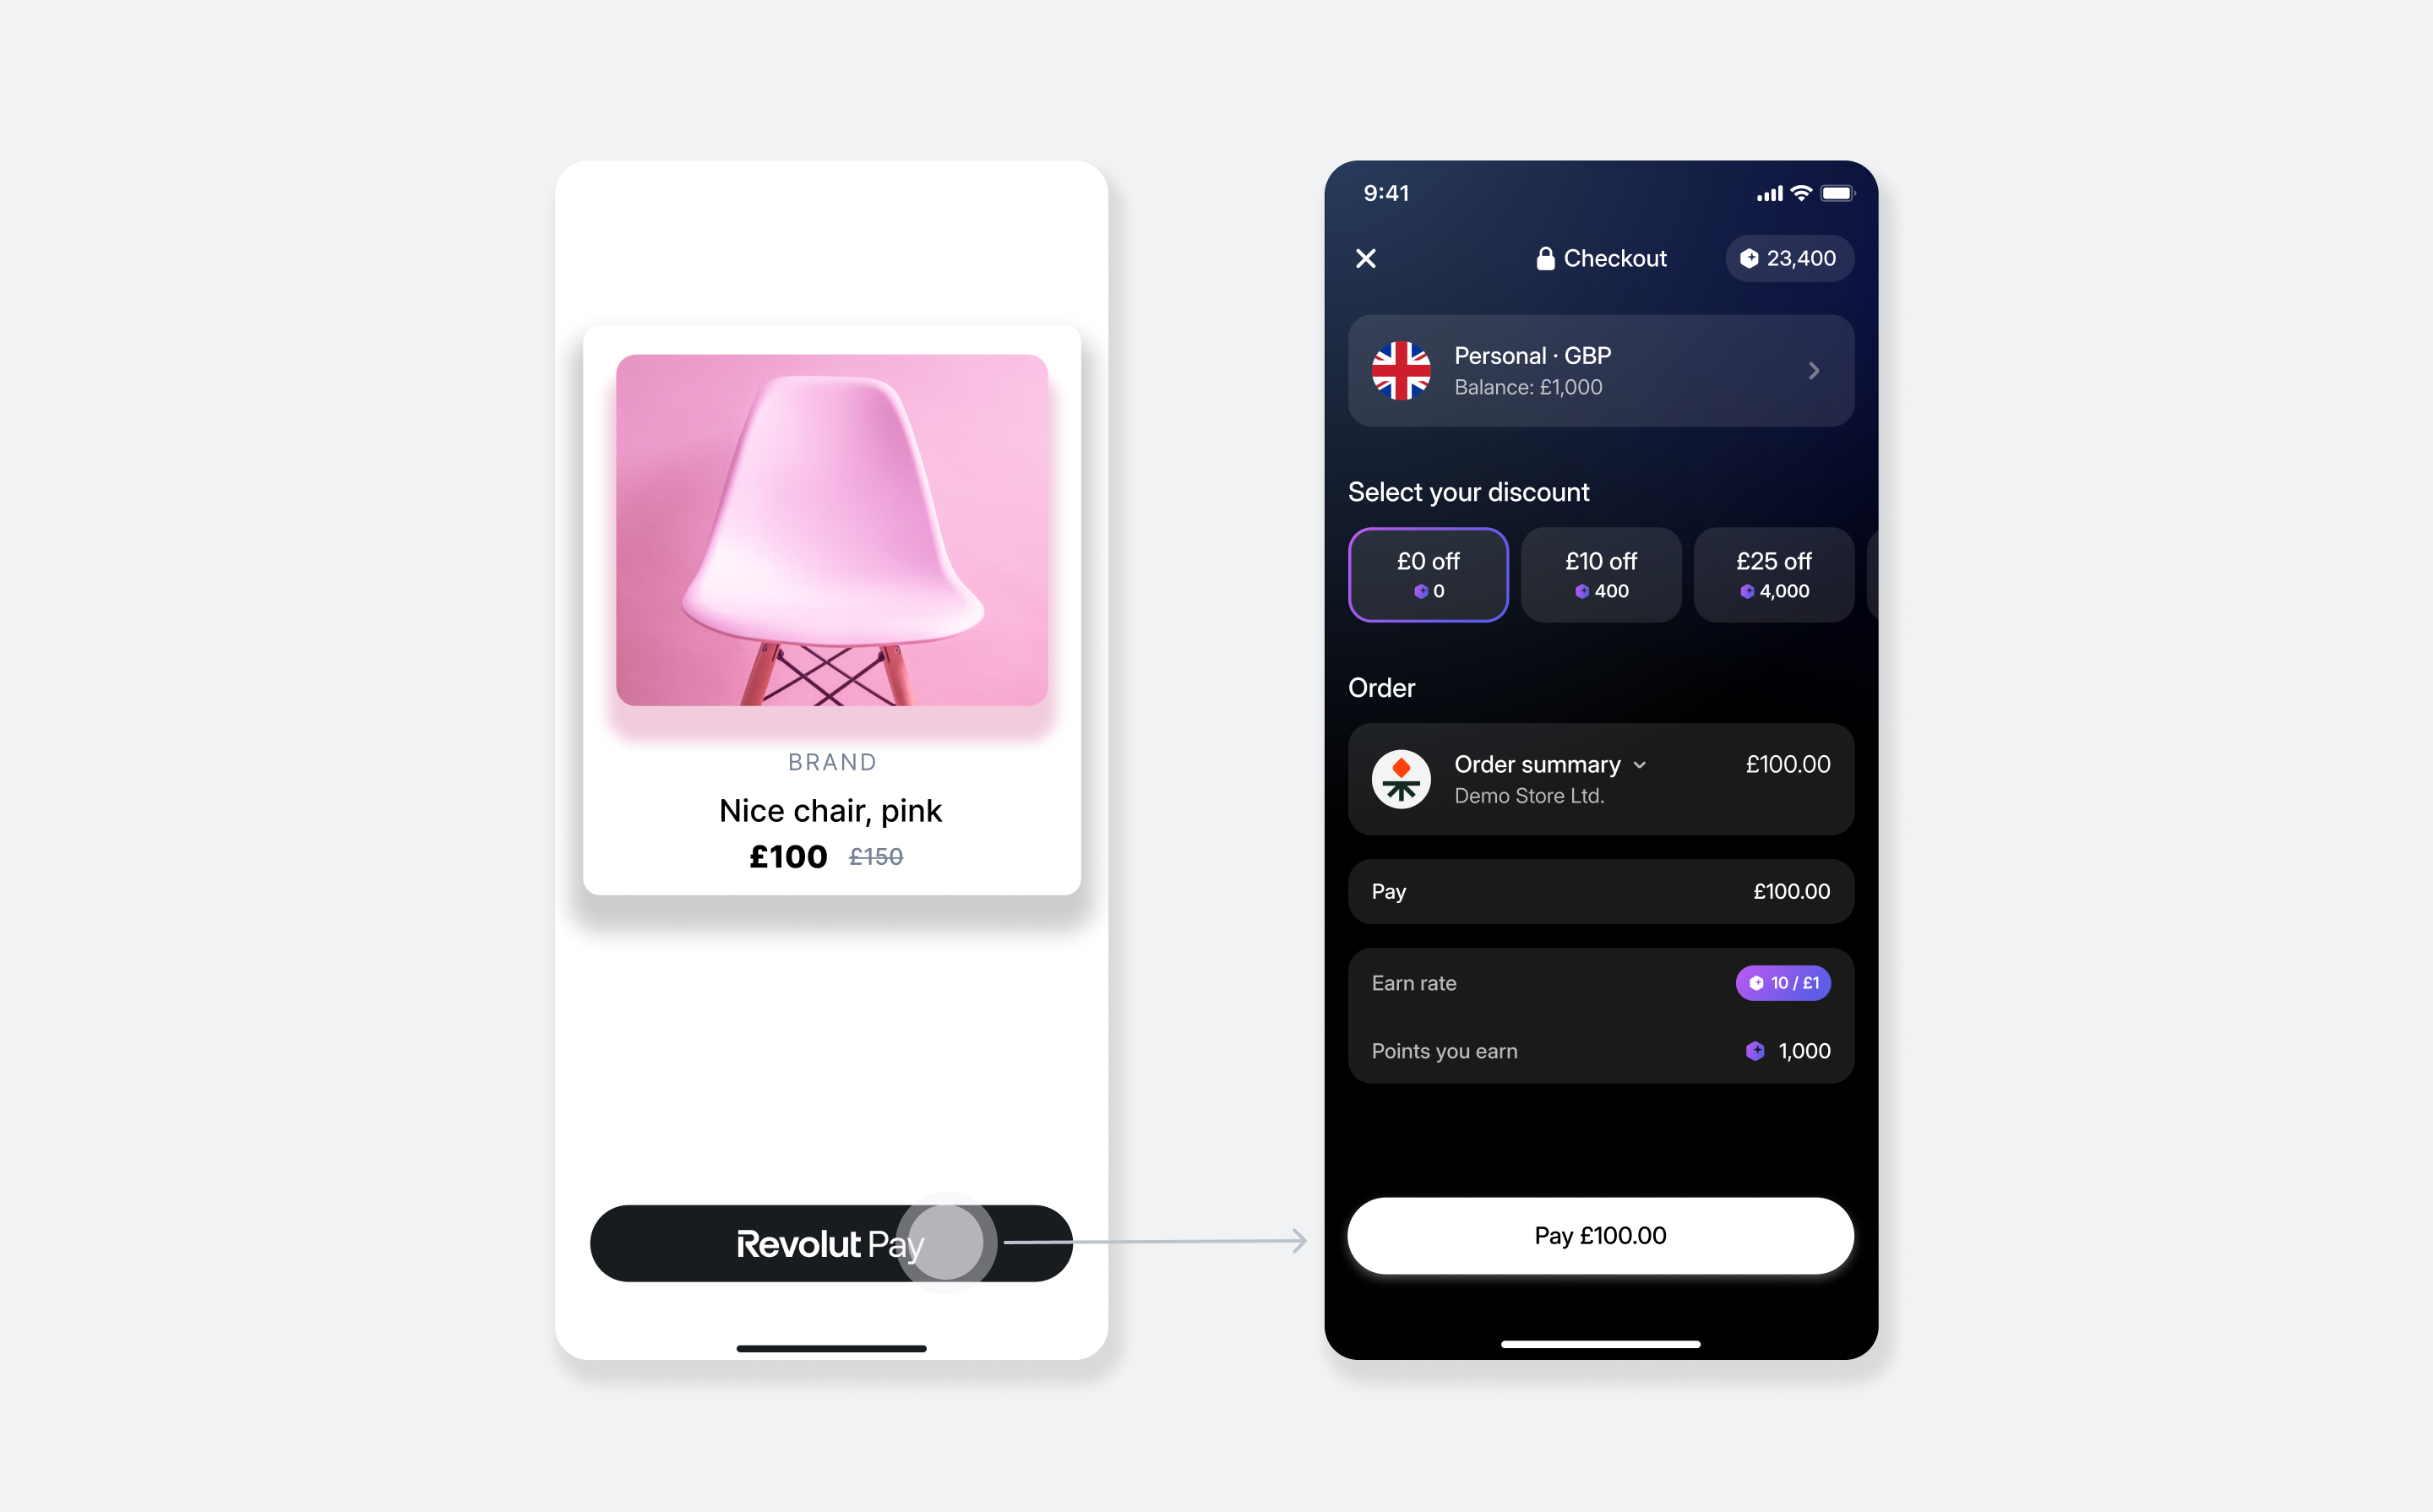
How it works
From an implementation perspective, the SDK works with the following components:
- Server-side: A server-side endpoint is required to securely communicate with the Merchant API to create orders.
- Client-side: The SDK is configured in your app with your public API key. When the customer taps the Revolut Pay button, the
onCreateOrdercallback calls your server to fetch an ordertoken, which the SDK uses to initiate the payment. - Endpoint for webhooks: Your server should listen for webhook events to reliably track the payment lifecycle. For more information, see: Use webhooks to keep track of the payment lifecycle.
Only Revolut Pay Lite is available for React Native. Revolut Pay Native - which renders the entire payment experience inside your app - is not supported. If you need Revolut Pay Native, see the iOS guide or Android guide.
By default, the SDK prioritises the Retail sign-in flow. If your merchant account is enabled for Revolut Pay for Business, you can prioritise the Business flow for business customers with the preferredMode prop.
The payment flow:
- The customer taps the Revolut Pay button.
- Your app calls
onCreateOrder, which fetches an ordertokenfrom your server. - The SDK checks for the Revolut app:
- If installed: The customer is redirected to the Revolut app to authorise the payment, then redirected to your app via deep link.
- If not installed: The SDK opens a secure in-app WebView for the customer to complete the payment.
- The SDK fires the
onCompletioncallback with the payment result. - Your server receives webhook notifications to confirm the payment's final state and securely fulfil the order.
Implementation overview
- Set up an endpoint for creating orders
- Configure deep link
- Install the SDK
- Initialise the SDK
- Add the Revolut Pay button
- Handle the payment result
- Set up webhooks
To see a working example, you can skip ahead.
Before you begin
Before you start this tutorial, make sure you have the following:
- An active Merchant account with Revolut Business. If you don't have one yet, apply for a Merchant account.
- Your API keys - both your public key (for initialising the SDK) and secret key (for creating orders on your backend). See Generate API keys.
- A backend server to securely create orders using the Merchant API. Your secret API key must never be exposed in your app.
- A React Native project with a checkout screen where you'll display the Revolut Pay button.
Implement Revolut Pay on React Native
This section walks you through the server- and client-side implementation step by step.
1. Set up an endpoint for creating orders
Before implementing the client-side SDK, you must first create a dedicated endpoint on your server. This is a critical security step, as your secret API key must never be exposed in your React Native application.
The role of this server-side endpoint is to act as a secure bridge between your app and the Merchant API. When a customer taps the Revolut Pay button in your app, your app will call this endpoint. Your endpoint is then responsible for:
- Receiving the checkout details (e.g.,
amount,currency) from the app request. - Securely calling the Merchant API: Create an order endpoint with the received details.
- Receiving the order details, including the public
token, back from the Merchant API. - Passing this
tokenback to your app in the response.
Later, the onCreateOrder callback calls this endpoint to fetch the token the SDK needs to initialise and process the payment.
Send a POST request to the Create an order endpoint with the order details, including your Secret API key in the authorisation header:
POST /api/orders HTTP/1.1
Host: merchant.revolut.com
Authorization: Bearer sk_abcdef12347890_...
Content-Type: application/json
Revolut-Api-Version: 2026-08-17

{
  "amount": 1000,
  "currency": "GBP"
}| Parameter | Description |
|---|---|
amount | The order amount in minor currency unit (e.g., cents). For £10.00, use 1000. |
currency | 3-letter ISO 4217 currency code for the payment. See supported currencies. |
Replace the Revolut-Api-Version value with your target API version. We highly recommend using the latest API version to access the latest features.
For complete details on all available parameters, see: Merchant API: Create an order.
2. Configure deep link
Revolut Pay Lite redirects customers to the Revolut app to authorise payment, then back to your app via a custom URL scheme. This step registers that scheme in the native platform files of your React Native project - not in JavaScript code.
Choose a scheme and host for your app (for example, scheme myapp and host revolut-pay). You will pass the resulting URL as returnURL to the Revolut Pay button in step 5.
React Native apps bundle native iOS and Android projects, so both platforms need to be configured before proceeding.
Add two entries to your Info.plist:
LSApplicationQueriesSchemes- allows the SDK to check whether the Revolut Retail and Business apps are installed.CFBundleURLTypes- registers your custom URL scheme so iOS routes the deep link back into your app.
<!-- Allow the SDK to query whether the Revolut Retail and Business apps are installed -->
<key>LSApplicationQueriesSchemes</key>
<array>
  <string>revolut</string>
  <string>revolut-business</string>
</array>

<!-- Register your app's custom URL scheme to receive deep links -->
<key>CFBundleURLTypes</key>
<array>
  <dict>
    <key>CFBundleURLSchemes</key>
    <array>
      <string>myapp</string>
    </array>
  </dict>
</array>After installing the SDK in step 3, you will add the URL handler to AppDelegate.swift in step 4.
3. Install the SDK
Add the following packages to your project with your preferred package manager:
npm install @revolut/revolut-pay-lite @revolut/revolut-payments-coreAfter installing the packages, complete the platform-specific native setup:
The package includes a CocoaPods podspec that declares the native iOS SDK dependency. Install it by running:
cd ios && bundle exec pod install && cd ..The minimum iOS version is determined by your React Native version. The SDK's podspec defers to your project's own minimum - no additional iOS version requirement is imposed.
4. Initialise the SDK
Import RevolutPaymentsSDK and call configure once at the module level of your root component file, before the component declaration. This ensures initialization runs exactly once when the app starts, independent of React's rendering lifecycle:
import { RevolutPaymentsSDK } from '@revolut/revolut-pay-lite'

RevolutPaymentsSDK.configure('<yourPublicApiKey>', 'production')
  .catch(error => console.error('SDK configuration error:', error))

function App() {
  // ...
}| Parameter | Description | Type | Required |
|---|---|---|---|
merchantPublicKey | Your Merchant Public API key used for authorisation, available in the Revolut Business dashboard. For the Sandbox environment use the Sandbox API Public key. | string | Yes |
environment | The API environment to connect to. Use 'sandbox' during development and testing. | 'sandbox' | 'production' | Yes |
5. Add the Revolut Pay button
5.1 Implement the onCreateOrder callback
The onCreateOrder callback is called when the customer taps the button. It must call the server-side endpoint you set up in step 1 and return the order token. The SDK passes this token to the Revolut app to link the payment session to this specific order.
const handleCreateOrder = async (): Promise<string> => {
  // Call the server-side endpoint you set up in step 1 and return the order token.
  // For more information, see: Merchant API: Create an order
  const order = await yourBackendCall()
  return order.token
}yourBackendCall() is a placeholder. In production, wrap your backend call in a try/catch block to handle network failures and server errors gracefully. Implement appropriate logging and retry logic before surfacing an error state to the customer.
5.2 Render the Revolut Pay button
Import and render RevolutPayButton on your checkout screen:
import { RevolutPayButton } from '@revolut/revolut-pay-lite'

const handleCreateOrder = async (): Promise<string> => {
  // Call the server-side endpoint you set up in step 1 and return the order token.
  const order = await yourBackendCall()
  return order.token
}

<RevolutPayButton
  returnURL='myapp://revolut-pay'
  onCreateOrder={handleCreateOrder}
  onCompletion={handleCompletion} // defined in step 6
/>| Property | Description | Type | Required |
|---|---|---|---|
returnURL | URL the Revolut app redirects to after payment. Must match the scheme and host you registered in step 2. | string | Yes |
onCreateOrder | Called when the customer taps the button. Must return the order token from your server. See step 5.1. | () => Promise<string> | Yes |
onCompletion | Called when the payment flow ends. Receives the payment outcome. Defined in step 6. | (event: RevolutPayCompletionEvent) => void | Yes |
preferredMode | Defines which Revolut Pay sign-in flow is prioritised when the checkout opens. Default: 'retail'. For available values, see Additional features. | 'retail' | 'retailOnly' | 'business' | 'businessOnly' | No |
buttonStyle | Visual styling options for the button. See Additional features. | object | No |
Additional features
The Revolut Pay SDK also offers a range of optional features for the checkout, as well as a promotional banner for your order confirmation screen.
Add a promotional banner
We recommend implementing the promotional banner. Analysis has shown that having the widget can increase conversion to payment by ~5%.
The RevolutPayPromotionalBanner widget offers rewards to customers who create a new Revolut account after checkout.
import { RevolutPayPromotionalBanner } from '@revolut/revolut-pay-lite'

<RevolutPayPromotionalBanner
  transactionId='<transaction-id>'
  amount={1000}
  currency='GBP'
/>| Property | Description | Type | Required |
|---|---|---|---|
transactionId | The unique ID of the payment corresponding to the promotional offer. | string | No |
amount | Order amount in minor currency units (e.g., 1000 = £10.00). | number | No |
currency | ISO 4217 currency code (e.g., 'GBP'). | string | No |
customer | Pre-fills the customer's details on the Revolut sign-up form. | object | No |
style | Optional React Native style applied to the banner container. | ViewStyle | No |
The customer object accepts the following optional fields:
| Property | Description | Type |
|---|---|---|
name | Customer's full name. | string |
email | Customer's email address. | string |
phone | Customer's phone number. | string |
Control Retail and Business flows
If your merchant account is enabled for Revolut Pay for Business, customers can check out from both their Revolut Retail (personal) and Business accounts. By default, the checkout prioritises the Retail sign-in flow, and customers can switch between the two flows in the checkout.
Use the preferredMode prop to prioritise one of the flows, or restrict the checkout to a single one:
<RevolutPayButton
  returnURL='myapp://revolut-pay'
  onCreateOrder={handleCreateOrder}
  onCompletion={handleCompletion} // defined in step 6
  preferredMode='businessOnly' // 'retail' (default), 'retailOnly', 'business', or 'businessOnly'
/>Each value supports a different use case:
| Value | Behaviour | Use case |
|---|---|---|
'retail' (default) | Prioritises the Retail flow. Customers can still switch to Revolut Business. | Checkouts aimed mainly at retail customers. |
'business' | Prioritises the Business flow. Customers can still switch to Revolut Retail. | Checkouts with mostly business customers, where retail payments stay available. |
'retailOnly' | Restricts the checkout to the Retail flow. Switching to Revolut Business is not offered. | Retail-only checkouts. |
'businessOnly' | Restricts the checkout to the Business flow. Switching to Revolut Retail is not offered. | B2B-only checkouts. |
Depending on the selected value, the customer is redirected to the Revolut Retail or Revolut Business app, or to the in-app WebView if the respective app is not installed. On iOS, make sure your Info.plist declares both the revolut and revolut-business URL schemes, as shown in step 2 - without revolut-business, the Revolut Business app cannot be detected.
For the behaviour of each value on iOS and Android, see: PreferredMode in the iOS SDK reference and PreferredMode in the Android SDK reference.
When the customer pays with a saved payment method, the checkout always opens the Retail flow regardless of preferredMode - saved payment method consent is currently supported only in the Retail flow.
Other features
Use the buttonStyle prop to fine-tune the checkout to your needs: match the button to your brand's look and feel - size, corner radius, colour variants, and the optional currency attachment.
<RevolutPayButton
  returnURL='myapp://revolut-pay'
  onCreateOrder={handleCreateOrder}
  onCompletion={handleCompletion}
  buttonStyle={{
    size: 'medium',
    radius: 'small',
    attachmentStyle: { currency: 'GBP' },
  }}
/>The buttonStyle prop accepts the following options:
| Property | Description | Type | Required |
|---|---|---|---|
size | Button size. Defaults to 'large'. | 'extraSmall' | 'small' | 'medium' | 'large' | No |
radius | Corner radius style. | 'small' | 'large' | No |
attachmentStyle | Set to null to hide the currency attachment entirely. | null | No |
attachmentStyle.currency | Currency code displayed alongside the Revolut Pay label. | string | No |
variants.anyMode | Forces the same colour variant in both light and dark display modes. Mutually exclusive with lightMode/darkMode. | 'light' | 'dark' | 'lightOutlined' | 'darkOutlined' | No |
variants.lightMode | Colour variant used when the device is in light mode. Mutually exclusive with anyMode. | 'light' | 'dark' | 'lightOutlined' | 'darkOutlined' | No |
variants.darkMode | Colour variant used when the device is in dark mode. Mutually exclusive with anyMode. | 'light' | 'dark' | 'lightOutlined' | 'darkOutlined' | No |
For button guidelines and marketing assets, see: Revolut Pay button guidelines.
6. Handle the payment result
When the customer finishes payment in the Revolut app, the Revolut app opens the deep link you registered in step 2 (for example, myapp://revolut-pay). The OS recognises your URL scheme and automatically delivers the link to a native callback in your project.
You pass that URL or URI to the SDK, which extracts the payment result from it and fires your onCompletion callback. This confirms the result at the UX-level only.
The authoritative payment status for your business logic - fulfilment, shipping, inventory - always arrives on your backend via webhooks, which you set up in step 7.
Before handling results, understand the roles of client-side results and server-side webhooks:
- Client-side callback (
onCompletion): This is perfect for handling frontend logic, such as displaying a success message, updating the UI, or showing an error to the customer. However, its delivery is not guaranteed - it might indicate a failure even if the customer later completes the payment, for example when they initially abandon the flow or a transient issue occurs during payment processing. - Webhooks: These are server-to-server notifications that we guarantee to send for every payment status change. You must rely on webhooks for all critical backend logic, such as confirming the order, releasing digital goods, or starting the shipping process.
Never use the client-side callback as the sole trigger for critical backend logic.
Connect the URL handler
In AppDelegate.swift (in your ios/ folder), import the RevolutPayLite framework and add the URL handler. You do not construct this URL - iOS delivers it because you registered the scheme in Info.plist in step 2. Calling RevolutPayKit.handle(url:) passes it to the SDK, which resolves the payment result and fires onCompletion.
Your implementation depends on your app's lifecycle management. Use the SceneDelegate method for modern, scene-based apps (the default since iOS 13). Use the AppDelegate method if your app has explicitly opted out of the scene-based lifecycle.
When the customer returns from the Revolut app, iOS automatically calls scene(_:openURLContexts:) - a standard UISceneDelegate system callback - and delivers the deep link URL in URLContexts.
import RevolutPayLite

func scene(_ scene: UIScene, openURLContexts URLContexts: Set<UIOpenURLContext>) {
    if let url = URLContexts.first?.url {
        RevolutPayKit.handle(url: url)
    }
}Confirm payment result in UI
Once the URL handler above has delivered the deep link to the SDK, the SDK calls your onCompletion callback with a status that tells you whether the payment succeeded, failed, or was abandoned by the customer. Handle each outcome to move the customer forward in the UI:
status | What happened | Suggested response |
|---|---|---|
success | The payment was authorised and completed. | Navigate to an order confirmation screen. |
failure | The payment failed. The error field contains a description. | Show an error message and offer the option to retry or use a different payment method. |
userAbandoned | The customer closed the payment flow without completing. | Return to the checkout screen - this is not an error. |
import {
  RevolutPayButton,
  RevolutPayCompletionEvent
} from '@revolut/revolut-pay-lite'

const handleCreateOrder = async (): Promise<string> => {
  // Call the server-side endpoint you set up in step 1 and return the order token.
  const order = await yourBackendCall()
  return order.token
}

const handleCompletion = (event: RevolutPayCompletionEvent) => {
  const { status, error } = event.nativeEvent

  switch (status) {
    case 'success':
      // Navigate to a confirmation screen
      break
    case 'failure':
      // Show an error message to the customer
      console.error('Payment failed:', error)
      break
    case 'userAbandoned':
      // Handle gracefully — the customer cancelled
      break
  }
}

<RevolutPayButton
  returnURL='myapp://revolut-pay'
  onCreateOrder={handleCreateOrder}
  onCompletion={handleCompletion}
/>When status is 'failure', the error field on event.nativeEvent is a string describing the failure from the underlying native SDK. Log it for debugging purposes.
A failure result is not necessarily final. The callback might indicate a failure even if the customer later completes the payment, such as when they initially abandon the flow or a transient issue occurs during payment processing.
Always verify the final payment status with your backend before treating the order as permanently failed.
7. Set up webhooks
Your backend must rely on webhooks as the authoritative source of payment status. The client-side onCompletion callback confirms the result at the UX level only - webhooks are guaranteed, server-to-server notifications that drive your critical backend logic.
Send a POST request to the Create a webhook endpoint with your webhook URL and the events you want to subscribe to:
POST /api/webhooks HTTP/1.1
Host: merchant.revolut.com
Authorization: Bearer sk_abcdef12347890_...
Content-Type: application/json
Revolut-Api-Version: 2026-08-17

{
  "url": "https://example.com/webhooks",
  "events": [
    "ORDER_COMPLETED",
    "ORDER_AUTHORISED",
    "ORDER_PAYMENT_DECLINED",
    "ORDER_PAYMENT_FAILED",
    "ORDER_CANCELLED",
    "ORDER_FAILED"
  ]
}| Parameter | Description |
|---|---|
url | Your webhook URL. Must be a valid HTTP or HTTPS URL capable of receiving POST requests. |
events | Array of event types to subscribe to. See Webhook events for the full list. |
For detailed information on setting up webhooks, see: Use webhooks to track order and payment lifecycle.
Payment outcomes
Handle the following scenarios in your webhook handler:
The payment has been authorised by the card network or the customer's Revolut account.
Webhooks expected:
| Webhook event | Description |
|---|---|
ORDER_AUTHORISED | The payment has been authorised but not yet captured |
ORDER_COMPLETED | The payment has been captured and completed |
What to do:
- Automatic capture (default): both
ORDER_AUTHORISEDandORDER_COMPLETEDfire in quick succession. Fulfil the order onceORDER_COMPLETEDis received. - Manual capture:
ORDER_AUTHORISEDfires first. Capture the payment to complete the transaction, or cancel the order to decline.ORDER_COMPLETEDfires after you capture.
Example
For a complete, working implementation, refer to the example app included in our public SDK repository:
The packages/revolut-pay-lite-demo directory demonstrates a complete Revolut Pay Lite integration. To run the demo:
-
Clone the repository:
Terminalgit clone https://github.com/revolut-mobile/revolut-payments-react-native.git -
Navigate to the demo package:
Terminalcd revolut-payments-react-native/packages/revolut-pay-lite-demo -
Install dependencies:
Terminalnpm install -
For iOS, install CocoaPods dependencies:
Terminalbundle install cd ios && bundle exec pod install && cd .. -
Run the app:
Terminal# iOS npm run ios # Android npm run android
Implementation checklist
The Sandbox environment replicates production behaviour. The Revolut retail app is not available in Sandbox, so the SDK will always fall back to the in-app WebView flow during testing.
For more information about Revolut Pay payment flows in Sandbox, see: Test flows.
Project setup
-
@revolut/revolut-pay-liteand@revolut/revolut-payments-coreare installed. - iOS
Info.plistincludesLSApplicationQueriesSchemeswithrevolutandrevolut-business. - iOS
Info.plistincludesCFBundleURLTypeswith your custom URL scheme. - iOS
AppDelegate.swiftcallsRevolutPayKit.handle(url:)in the URL context handler. - Android
AndroidManifest.xmlincludes the deep link<intent-filter>. - Android
MainActivity.ktimplementsRevolutPaymentControllerHolderand overridesonNewIntent. -
RevolutPaymentsSDK.configureis called before any payment component renders.
Payment flow
- The Revolut Pay button appears correctly on the checkout screen.
- Tapping the button calls your server to create an order and receives a
token. - Test case 1 (Revolut app installed): Payment completes via redirect to the Revolut app and back.
- Test case 2 (Revolut app not installed): Payment completes via the in-app WebView.
- A successful payment triggers the expected UI update.
- A failed payment shows an appropriate error message.
- The user cancelling the payment flow is handled gracefully.
Backend verification
- Webhook URL is registered and your server receives events (e.g.,
ORDER_COMPLETED,ORDER_PAYMENT_FAILED,ORDER_CANCELLED). - Order fulfilment logic is only triggered after receiving a successful webhook, not from the client-side
onCompletioncallback.
Congratulations! You've successfully implemented Revolut Pay and are ready to accept the first payment.