
Add the Revolut Pay button to your app, confirm payment results in your UI, and fulfil orders on authoritative webhooks.
Revolut Pay allows your customers to pay with their card or their Revolut Retail or Revolut Business account, delivering a streamlined checkout experience through your Android application.
In this tutorial, we'll guide you through integrating Revolut Pay, powered by the Revolut Pay SDK for Android. The SDK handles the entire payment flow, including presenting native payment sheets, handling customer authentication, and redirecting to the Revolut app when needed, reducing friction and improving conversion rates.
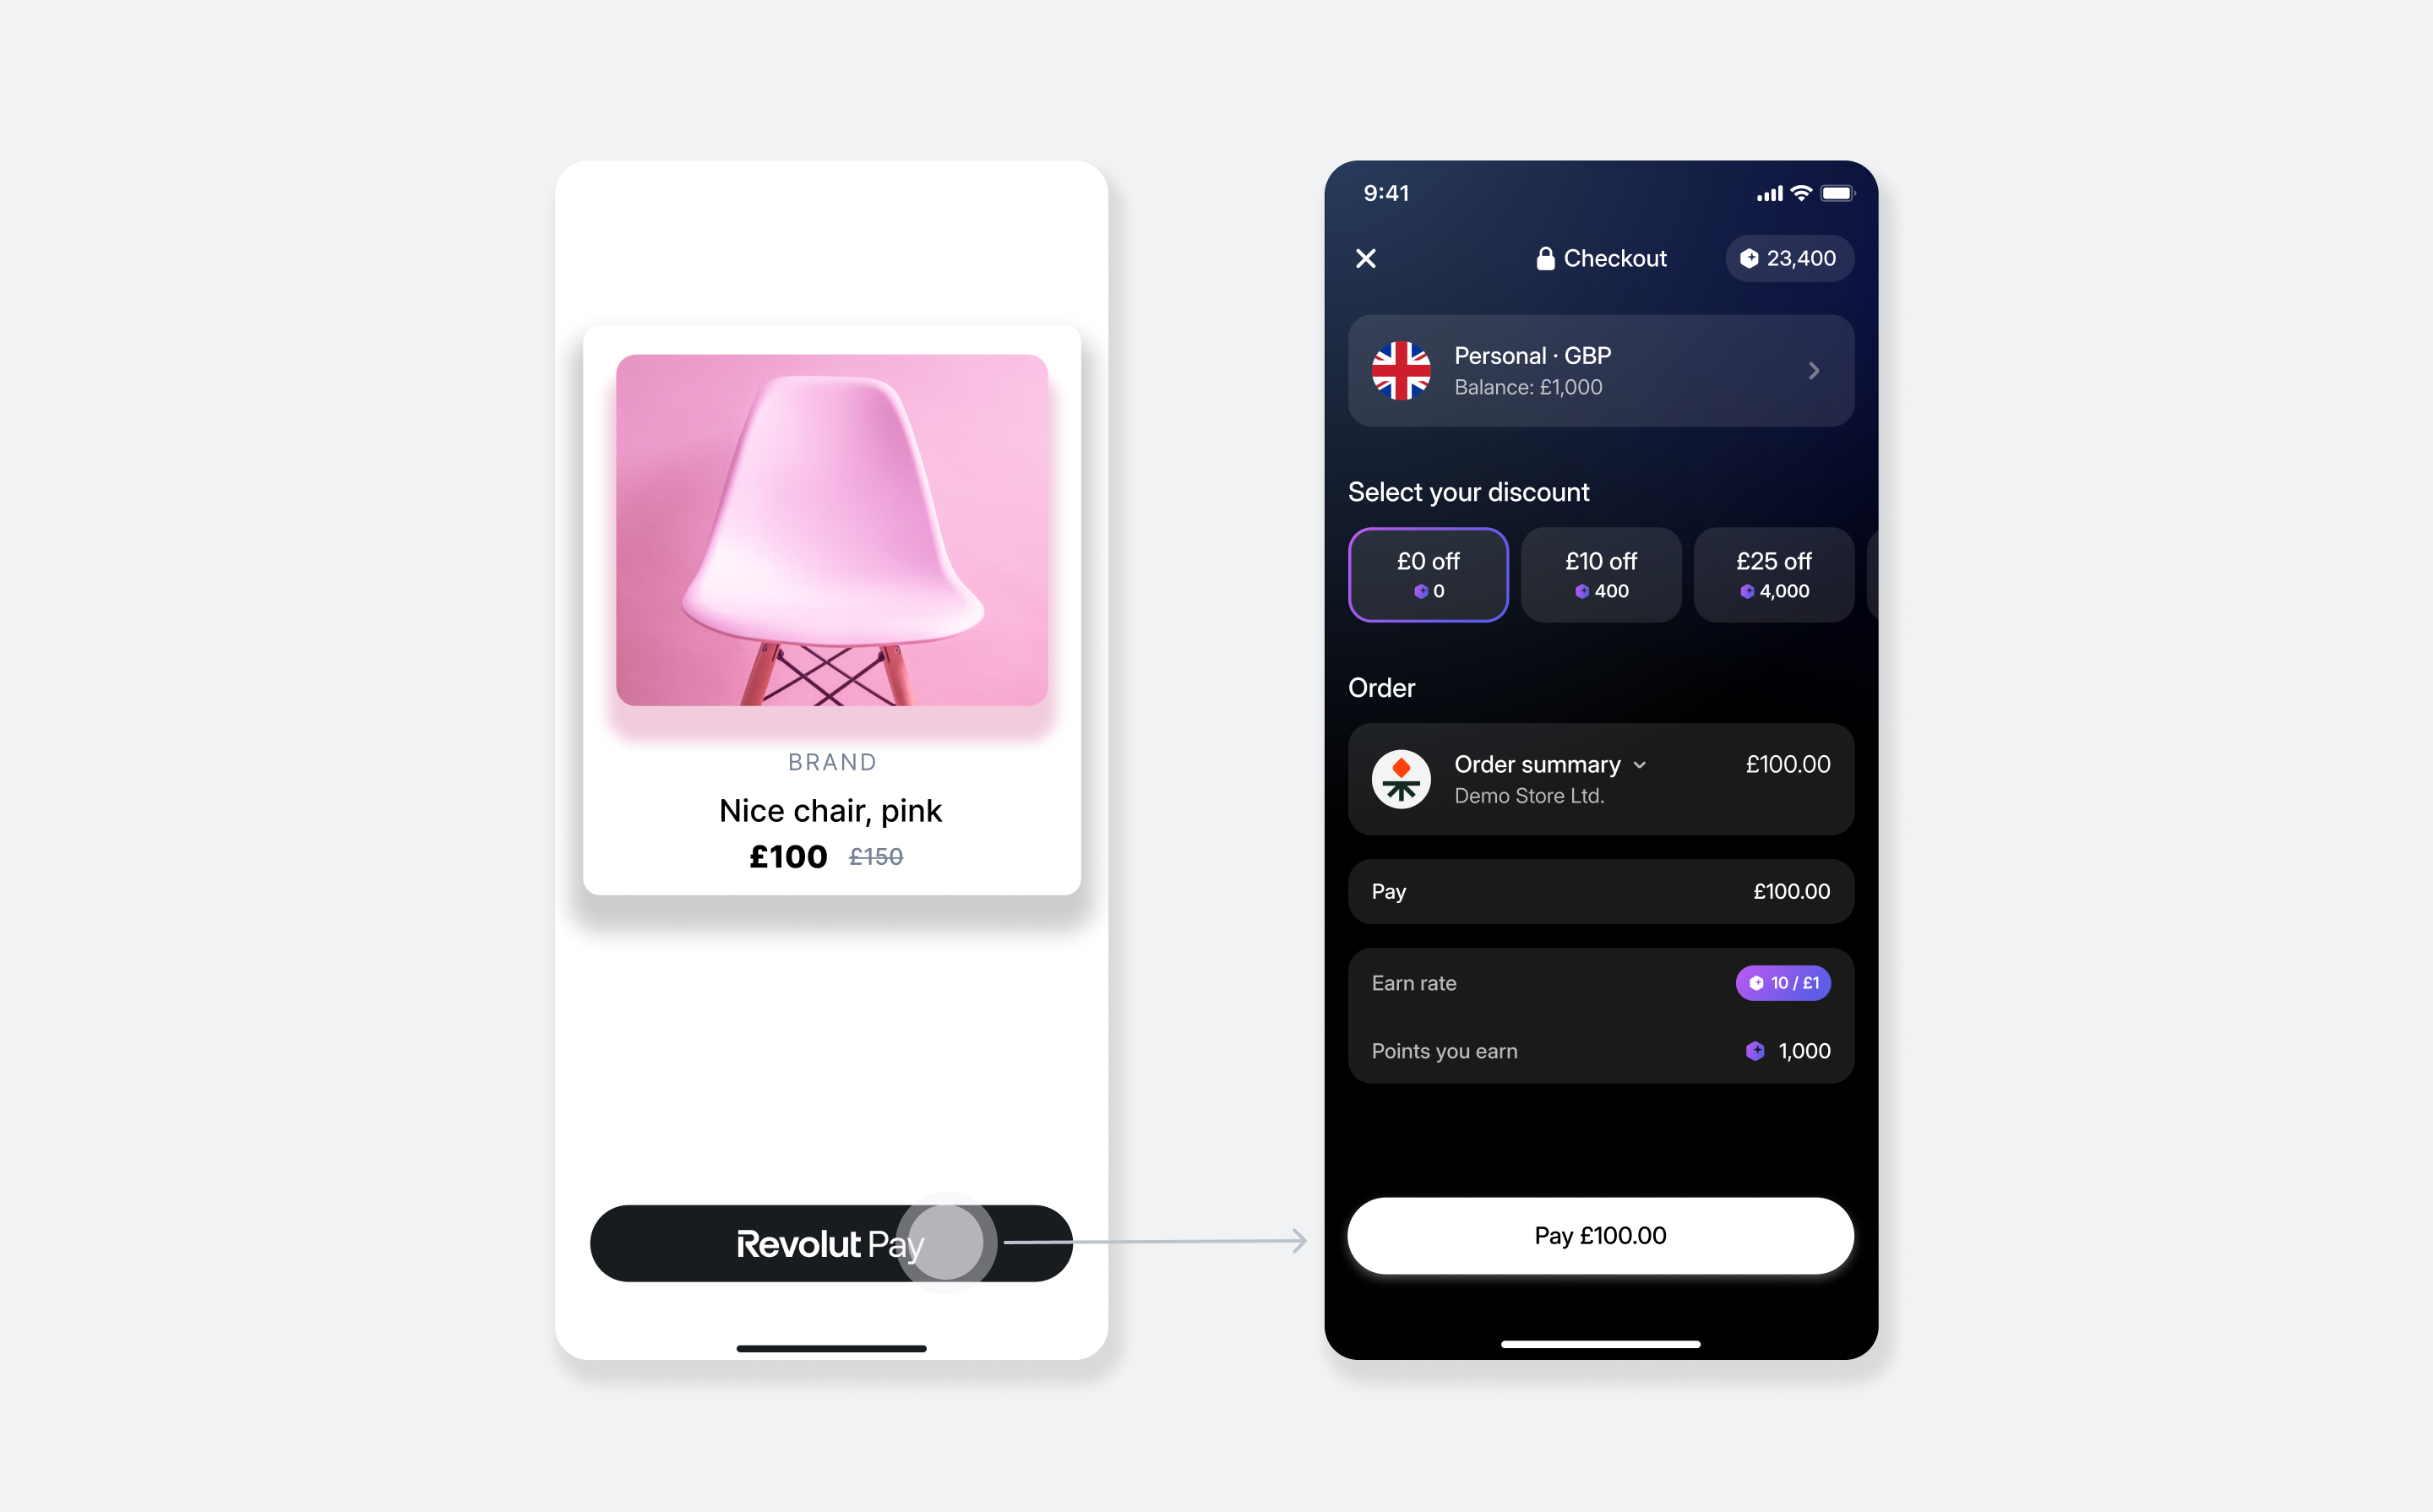
How it works
From an implementation perspective, integrating Revolut Pay into your Android app with the Revolut Pay SDK involves the following components:
- Server-side: An endpoint on your server to securely create an order with the Revolut Merchant API.
- Client-side: Your Android app uses the Revolut Pay SDK to display the Revolut Pay button, collect payment details, and handle the user flow.
- Endpoint for webhooks: Optionally, you can set up an endpoint to receive webhook events from the Merchant API to track the payment lifecycle. For more information, see: Use webhooks to keep track of the payment lifecycle.
By default, the SDK prioritises the Retail sign-in flow. If Revolut Pay for Business is enabled for your merchant account, you can prioritise the Business flow with the preferredMode parameter.
Available versions
The Revolut Pay Android SDK is available in two variants:
Both SDK variants have a binary size of approximately 656 KB but may add approximately 5 MB to your app's final APK size due to dependencies.
| SDK | Description |
|---|---|
| Revolut Pay Native (recommended) | Initialises Revolut Pay UI within your app. If the Revolut retail app is installed, a fully native payment flow is launched. If it is not installed, the SDK falls back to a guest checkout in a WebView. Requires sharing your app's SHA-256 certificate fingerprint with Revolut (see Step 2.2). |
| Revolut Pay Lite | Triggers a redirect to the Revolut retail app to make the payment. If the Revolut retail app is not installed, the SDK falls back to a guest checkout in a WebView within your app. |
Revolut Pay Native and Revolut Pay Lite follow the same version numbering - the latest version of both is 3.4.0. Both also support savePaymentMethodForMerchant for Merchant Initiated Transactions (MIT).
The payment flow for each variant:
With Revolut Pay Native, the primary payment flow stays within your app. If the Revolut retail app is installed, the SDK launches a native payment flow directly within your app. If it is not installed, the SDK falls back to a guest checkout in a WebView within your app.
In some cases — such as when the Revolut app cannot validate your app's identity, or when using a Business app preferredMode — the customer may be temporarily redirected to the Revolut app and returned to your app via your deep link (see Step 4.3).
- The customer taps the Revolut Pay button in your app.
- Your app obtains an order
tokenfrom your server and passes it to the SDK to initialise the payment. - The SDK checks whether the Revolut retail app is installed:
- If installed: The SDK launches a native payment flow directly inside your app. The customer is not redirected to the Revolut retail app, except in specific edge cases (see the note below and Step 4.3).
- If not installed: The SDK opens a guest checkout in a WebView inside your app.
- The customer reviews and authorises the payment.
- The SDK processes the payment and returns the result to your app.
- Optionally, your server receives webhook notifications about each event you're subscribed to. For more information, see: Use webhooks to keep track of the payment lifecycle.
By default, the SDK prioritises the Retail sign-in flow. If Revolut Pay for Business is enabled for your merchant account, you can control which flow the checkout opens with the preferredMode parameter - see Additional features.
For more information about the order and payment lifecycle, see: Order and payment lifecycle.
Implementation overview
The high-level implementation steps are the following:
- Set up an endpoint for creating orders
- Configure your Android project
- Initialise the SDK
- Implement the payment flow
- Handle payment result
To see a working example, you can skip ahead.
Before you begin
Before you start this tutorial, make sure you have the following:
- An active Merchant account with Revolut Business. If you don't have one yet, apply for a Merchant account.
- Your API keys - both your public key (for initialising the SDK) and secret key (for creating orders on your backend). See Generate API keys.
- A backend server to securely create orders using the Merchant API. Your secret API key must never be exposed in your app.
- An Android app with a checkout screen where you'll display the Revolut Pay button.
- (Revolut Pay Native only) Your app's SHA-256 certificate fingerprint shared with Revolut - required before Revolut Pay Native can verify your app's identity.
Implement Revolut Pay on Android
1. Set up an endpoint for creating orders
Before implementing the client-side SDK, you must first create a dedicated endpoint on your server. This is a critical security step, as your secret API key must never be exposed in your Android application.
The role of this server-side endpoint is to act as a secure bridge between your app and the Merchant API. When the customer taps the Revolut Pay button in your app, your app calls this endpoint. Your endpoint is then responsible for:
- Receiving the checkout details (e.g.,
amount,currency) from the app request. - Securely calling the Merchant API: Create an order endpoint with the received details.
- Receiving the order details, including the public
token, back from the Merchant API. - Passing this
tokenback to your app in the response.
Later, the button's click listener calls this endpoint to fetch the token the SDK needs to initialise and process the payment (see Step 4.2).
Send a POST request to the Create an order endpoint with the order details, including your Secret API key in the authorisation header:
POST /api/orders HTTP/1.1
Host: merchant.revolut.com
Authorization: Bearer sk_abcdef12347890_...
Content-Type: application/json
Revolut-Api-Version: 2026-08-17

{
  "amount": 1000,
  "currency": "GBP"
}| Parameter | Description |
|---|---|
amount | The order amount in minor currency unit (e.g., cents). For £10.00, use 1000. |
currency | 3-letter ISO 4217 currency code for the payment. See supported currencies. |
Replace the Revolut-Api-Version value with your target API version. We highly recommend using the latest API version to access the latest features.
For complete details on all available parameters, see: Merchant API: Create an order.
2. Configure your Android project
This section covers the one-time setup tasks required to prepare your Android project for the SDK.
2.1 Install the SDK
Check the Available versions section to determine which SDK variant is right for your needs.
If you are upgrading from 3.2.1 or earlier, the following breaking changes apply:
- Kotlin:
ButtonParams.variantModeshas been renamed tovariants. The parameter is now optional and defaults toVariantModes(). - Kotlin:
VariantModesdefaults have been swapped:lightModenow defaults toVariant.DARK,darkModetoVariant.LIGHT. - Kotlin:
OrderParams.preferredModeis now non-nullable and defaults toPreferredMode.RETAIL. Existing code passingnullwill no longer compile — remove the explicitnullto use the default. - XML:
app:revolutPay_VariantDarkThemeandapp:revolutPay_VariantLightThemehave been renamed toapp:revolutPay_VariantDarkModeandapp:revolutPay_VariantLightMode. The values have been swapped to match the newVariantsemantics. - Minimum SDK:
minSdkVersionhas been raised from API 24 (Android 7.0) to API 28 (Android 9.0). Update your app'sminSdkVersioninbuild.gradle.
If you're upgrading the SDK version to 3.2.0 or later, your app build may fail due to duplicate OSGI manifest resources.
For more information about how to fix this issue, see Revolut Pay Android SDK: Troubleshooting.
Add the mavenCentral repository
If it's not already there, add the mavenCentral() repository to your project-level build.gradle file:
allprojects {
    repositories {
        mavenCentral()
    }
}Add the Revolut Pay Native dependency
Add the dependency to your module-level build.gradle file:
implementation 'com.revolut.payments:revolutpay:3.4.0'Sync the Gradle files
Sync your project with the Gradle files.
The minimum supported Android SDK version is API 28 (Android 9.0, Pie).
2.2 Set up your SHA-256 certificate fingerprint
This step is only required when implementing Revolut Pay Native.
To enable the native Revolut Pay SDK to verify your app's identity and deliver a secure, seamless payment experience, you must share your app's SHA-256 certificate fingerprint with Revolut.
Obtain your SHA-256 certificate fingerprint
Use one of the following methods:
-
Run the Gradle signing report from your project root and locate the
SHA-256value in the output for your release variant:Terminal./gradlew signingReport -
If you use Google Play App Signing, find your fingerprint in the Google Play Console under Setup > App integrity > App signing. For more information, see the Google Play developer documentation.
Share your fingerprint with Revolut
Email your SHA-256 certificate fingerprint to merchant-integration@revolut.com.
Use the fingerprint from your release keystore, not your debug keystore. A mismatch between the registered and actual fingerprint will prevent Revolut Pay Native from working correctly.
2.3 Configure the App Manifest
You need to declare necessary permissions and set up a deep link for redirection in your AndroidManifest.xml.
Add internet permission
The SDK requires network access.
<uses-permission android:name="android.permission.INTERNET" />Set up a deep link for redirection
This step is required for both Revolut Pay Native and Revolut Pay Lite. Revolut Pay Lite always uses the deep link to redirect the customer back from the Revolut app. Revolut Pay Native uses it for edge-case fallbacks where the customer is temporarily redirected to the Revolut app.
A deep link is required for the Revolut app to redirect the user back to your app after payment authorisation.
In your AndroidManifest.xml, add an <intent-filter> to the activity that will handle the result.
<activity
    android:name=".MainActivity"
    android:launchMode="singleTop">
    <intent-filter>
        <action android:name="android.intent.action.VIEW" />
        <category android:name="android.intent.category.DEFAULT" />
        <category android:name="android.intent.category.BROWSABLE" />
        <data
            android:host="payment-return"
            android:scheme="myapp" />
    </intent-filter>
</activity>- Replace
myappandpayment-returnwith a unique scheme and host for your app. - The activity
launchModemust besingleTopto ensure the existing activity instance receives the result instead of creating a new one.
3. Initialise the SDK
In your application's entry point (e.g., the onCreate method of your Application class), initialise the Revolut Pay SDK with your public API key.
import com.revolut.payments.RevolutPaymentsSDK

class MyApplication : Application() {
    override fun onCreate() {
        super.onCreate()
        RevolutPaymentsSDK.configure(
            RevolutPaymentsSDK.Configuration(
                merchantPublicKey = "<yourPublicApiKey>",
                environment = RevolutPaymentsSDK.Environment.SANDBOX // Or .PRODUCTION
            )
        )
    }
}The Configuration object accepts the following parameters:
| Parameter | Description |
|---|---|
merchantPublicKey | Your Merchant API public key used for authorisation. |
environment | The API environment the SDK operates in: Environment.SANDBOX for testing or Environment.PRODUCTION for live payments. |
The deep link URI will be provided later when creating payment orders.
4. Implement the payment flow
Now, you will add the Revolut Pay button to your UI and connect it to your backend to handle payments.
4.1 Add the Revolut Pay button
You can add the Revolut Pay button to your checkout screen either programmatically or via XML layout.
Create an instance of the button in your activity or fragment code.
import com.revolut.payments.RevolutPaymentsSDK
import com.revolut.revolutpay.api.revolutPay
import com.revolut.revolutpay.api.button.ButtonParams
import com.revolut.revolutpay.api.button.Radius
import com.revolut.revolutpay.api.button.Size
import com.revolut.revolutpay.api.button.Variant
import com.revolut.revolutpay.api.button.VariantModes
import com.revolut.revolutpay.api.button.BoxText

// ...

val buttonParams = ButtonParams(
    buttonSize = Size.LARGE,
    radius = Radius.MEDIUM,
    variants = VariantModes(lightMode = Variant.DARK, darkMode = Variant.LIGHT),
    boxText = BoxText.NONE
)

val revolutPayButton = RevolutPaymentsSDK.revolutPay.provideButton(
    context = this,
    params = buttonParams
)

// Add the button to your view hierarchy
your_layout.addView(revolutPayButton)The ButtonParams object accepts the following parameters:
| Parameter | Description |
|---|---|
buttonSize | Defines the size of the button. Default: Size.LARGE. |
radius | Defines the corner radius of the button. Default: Radius.NONE. |
variants | Defines the dark and light theme variants used in different display modes of the device. |
boxText | Defines the appearance of the optional view shown under the button, used to inform the user about the provided reward. Default: BoxText.NONE. |
For more information on available parameters or customising the button's appearance, see: Revolut Pay Android SDK and Revolut Pay button guidelines.
4.2 Set up payment controller and button interaction
Now, let's wire everything up. You'll create a payment controller to manage the payment process and then configure your Revolut Pay button to use this controller when tapped.
Create the payment controller
First, create an instance of the paymentController. This component is responsible for launching the payment flow and returning the final result (success, failure, or user cancellation) to your app.
The payment controller must be created unconditionally during Activity or Fragment initialisation.
This ensures that the result callback is always correctly registered, and that the payment result is handled properly even after configuration changes.
import com.revolut.payments.RevolutPaymentsSDK
import com.revolut.revolutpay.api.PaymentResult
import com.revolut.revolutpay.api.order.OrderParams
import com.revolut.revolutpay.api.revolutPay
import androidx.core.net.toUri

// Create payment controller in your Activity or Fragment
private val paymentController = RevolutPaymentsSDK.revolutPay.createController(this) { paymentResult ->
    when (paymentResult) {
        is PaymentResult.Success -> {
            // Payment successful - update your UI
            showSuccessMessage()
        }
        is PaymentResult.UserAbandonedPayment -> {
            // User cancelled the payment
            showCancelledMessage()
        }
        is PaymentResult.Failure -> {
            // Payment failed - show error and log details
            showErrorMessage()
            Log.e("RevolutPay", "Payment failed", paymentResult.exception)
        }
    }
}Configure the Revolut Pay button
With the controller ready, you can configure the button's behaviour, also within onCreate() or onViewCreated(). This involves two main actions:
- Binding the payment state: This links the button's appearance (e.g., showing a loading spinner) to the controller's current state automatically.
- Setting a click listener: This defines the action to take when the user taps the button—fetching the order
tokenfrom your backend and starting the payment.
// In your Activity/Fragment's onCreate() or onViewCreated()

// 1. Bind the button's loading state to payment controller's state
revolutPayButton.bindPaymentState(paymentController, this)

// 2. Set the button's click listener to start the payment
revolutPayButton.setOnClickListener {
    // Show a loading indicator on the button
    revolutPayButton.showBlockingLoading(true)

    viewLifecycleOwner.lifecycleScope.launch {
        try {
            // Call your backend to get the order token
            val orderToken = fetchOrderTokenFromBackend()

            // Start the payment with the token (and other order details)
            paymentController.pay(
                OrderParams(
                    orderToken = orderToken,
                    returnUri = "myapp://payment-return".toUri(), // Must match your deep link from step 2.3
                    requestShipping = false, // Set to true for Fast checkout - see Additional features
                    savePaymentMethodForMerchant = false, // Set to true for MIT - see Additional features
                    customer = null // Optional customer details to pre-fill the checkout
                )
            )
        } catch (e: Exception) {
            // Handle any errors during the token fetch
            revolutPayButton.showBlockingLoading(false)
            showErrorMessage()
        }
    }
}The OrderParams object accepts the following parameters:
| Parameter | Description |
|---|---|
orderToken | The token for the order created via the Merchant API, passed to the SDK from your backend. |
returnUri | A deep link URI the Revolut app uses to return to your app after the payment is confirmed or rejected. Must match your deep link from step 2.3. |
requestShipping | If true, the shipping address and delivery method are collected through Revolut Pay (Fast checkout). |
savePaymentMethodForMerchant | If true, the customer consents to saving their payment method for future merchant-initiated transactions. |
customer | A Customer object to pre-fill user data in the payment flow. |
preferredMode | Defines which Revolut Pay sign-in flow is opened with priority when the checkout opens. Default: RETAIL. |
Implement fetchOrderTokenFromBackend()
In the code above, fetchOrderTokenFromBackend() is a placeholder for a function you must create. This function's job is to make a network request to the server endpoint you built in Step 1. It sends the order details (like amount and currency) to your server and gets the unique order token in return.
Because this is a network operation it must be performed off the main UI thread. The example uses lifecycleScope.launch (a Kotlin Coroutine) to handle this, which is the recommended approach.
4.3 Handle deep link redirect
This step is required for both Revolut Pay Native and Revolut Pay Lite. In certain edge cases, such as when the Revolut app cannot validate your app's identity, or when using a Business app preferredMode, the customer may be temporarily redirected to the Revolut app. The onNewIntent() handler below ensures your app correctly processes the return redirect.
After the customer authorises the payment in the Revolut retail app, they are redirected back to your app using the deep link you configured in Step 2.3.
You need to catch this redirect in the Activity you configured with the <intent-filter>. To do this, override the onNewIntent() method and pass the incoming URI to the Revolut Pay SDK for processing.
import com.revolut.payments.RevolutPaymentsSDK
import com.revolut.revolutpay.api.revolutPay

override fun onNewIntent(intent: Intent?) {
    super.onNewIntent(intent)
    intent?.data?.let { uri ->
        // Pass the deep link URI to the Revolut Pay SDK for processing
        RevolutPaymentsSDK.revolutPay.handle(uri)
    }
}The SDK processes this URI internally. You don't need to parse it yourself. The final PaymentResult is automatically delivered to the paymentController callback you configured in Step 4.2.
The callbacks are executed on the main thread. For network operations like creating an order, ensure you switch to a background thread (e.g., using Kotlin Coroutines).
Additional features
The Revolut Pay SDK also offers a range of optional features you can enable when starting the payment, as well as a promotional banner for your order confirmation screen.
Save payment method and Fast checkout are mutually exclusive - you can enable one or the other, but not both in the same OrderParams.
Add a promotional banner
We recommend implementing the promotional banner. Analysis has shown that having the widget can increase conversion to payment by ~5%.
You can add a promotional banner to your order confirmation or "thank you" screen to offer rewards to new customers who sign up for a Revolut account after checkout.
To add the banner, call the RevolutPaymentsSDK.revolutPay.providePromotionalBannerWidget(context: Context, params: PromoBannerParams) method. This requires PromoBannerParams, which includes the transactionId from your server.
// In your order confirmation Activity (e.g., OrderConfirmationActivity.kt)

import com.revolut.revolutpay.api.promobanner.Currency
import com.revolut.revolutpay.api.promobanner.Customer
import com.revolut.revolutpay.api.promobanner.DateOfBirth
import com.revolut.revolutpay.api.promobanner.PromoBannerParams
import com.revolut.revolutpay.api.promobanner.CountryCode
import com.revolut.payments.RevolutPaymentsSDK
import com.revolut.revolutpay.api.revolutPay

class OrderConfirmationActivity : AppCompatActivity() {

    override fun onCreate(savedInstanceState: Bundle?) {
        super.onCreate(savedInstanceState)
        setContentView(R.layout.activity_order_confirmation)

        // 1. Get the order token you passed to this activity after a successful payment.
        // This is the `token` from the order object you received from your server in Step 1.
        val orderIdFromServer = intent.getStringExtra("ORDER_ID") ?: ""

        // 2. Define the parameters for the banner.
        val bannerParams = PromoBannerParams(
            transactionId = orderIdFromServer,
            paymentAmount = 1000, // Amount in the smallest currency unit (e.g., cents)
            currency = Currency.EUR,
            customer = Customer(
                name = "Example Customer",
                email = "example.customer@email.com",
                phone = "+441234567890",
                dateOfBirth = DateOfBirth(_day = 1, _month = 2, _year = 2000),
                country = CountryCode.GB,
            )
        )

        // 3. Create the banner widget.
        val promotionalBanner = RevolutPaymentsSDK.revolutPay.providePromotionalBannerWidget(
            context = this,
            params = bannerParams
        )

        // 4. Add the banner to your layout.
        // Assuming you have a LinearLayout with id 'banner_container' in your XML file.
        val bannerContainer = findViewById<LinearLayout>(R.id.banner_container)
        bannerContainer.addView(promotionalBanner)
    }
}The PromoBannerParams object accepts the following parameters:
| Parameter | Description |
|---|---|
transactionId | The token of the order connected to the promotional offer. |
currency | Currency of the order using the Currency enum. |
paymentAmount | The amount to be paid by the customer, given in the lowest denomination (e.g., cents). |
customer | A Customer object to pre-fill user data in the banner flow. Only valid details are prefilled. |
To customise the banner's appearance, define a theme in a style resource file:
<style name="RevolutPay_RevolutPayBanner">
    <item name="revolutPay_ColorAccent">#0666EB</item>
    <item name="revolutPay_ColorBackground">#F7F7F7</item>
    <item name="revolutPay_BannerCornerRadius">12dp</item>
    <item name="revolutPay_ComponentCornerRadius">12dp</item>
    <item name="revolutPay_StrokeWidth">0dp</item>
    <item name="revolutPay_StrokeColor">#BBC4CD</item>
</style>Then, reference this theme when creating the widget:
val promotionalBanner = RevolutPaymentsSDK.revolutPay.providePromotionalBannerWidget(
    context = this,
    params = bannerParams,
    themeId = R.style.RevolutPay_RevolutPayBanner
)For more information about the banner and its parameters, see: PromoBannerParams.
Save payment method
Set savePaymentMethodForMerchant to true in your OrderParams to save the customer's payment method for future merchant-initiated transactions (MIT), such as subscriptions or one-click repeat purchases. It is supported by both Revolut Pay Native and Revolut Pay Lite.
For more information, see: Charge a saved payment method and Manage subscriptions.
paymentController.pay(
    OrderParams(
        orderToken = orderToken,
        returnUri = "myapp://payment-return".toUri(),
        savePaymentMethodForMerchant = true,
        requestShipping = false,
        customer = null
    )
)To save a payment method, you must either create a customer object during order creation, or provide the ID of an existing customer - otherwise the payment method is not saved.
For automated recurring billing built on saved payment methods, see: Subscriptions API introduction.
Collect shipping details with Fast checkout
Set requestShipping to true in your OrderParams to enable Fast checkout. The customer's shipping address and delivery method are then collected through Revolut Pay, letting you skip building your own shipping flow and allowing the customer to reuse their details already stored in Revolut Pay.
paymentController.pay(
    OrderParams(
        orderToken = orderToken,
        returnUri = "myapp://payment-return".toUri(),
        requestShipping = true,
        savePaymentMethodForMerchant = false,
        customer = null
    )
)Your backend must support the Fast checkout flow for this feature to work. For more information, see: Fast checkout guide.
Control Retail and Business flows
If your merchant account is enabled for Revolut Pay for Business, customers can check out from both their Revolut Retail (personal) and Business accounts. By default, the checkout prioritises the Retail sign-in flow, and customers can switch between the two flows in the checkout.
To use preferredMode, you need SDK version 3.4.0 or later.
Use the preferredMode parameter in your OrderParams to prioritise one of the flows, or restrict the checkout to a single one:
// Don't forget the additional import:
// import com.revolut.revolutpay.api.order.PreferredMode

paymentController.pay(
    OrderParams(
        orderToken = orderToken,
        returnUri = "myapp://payment-return".toUri(),
        requestShipping = false,
        savePaymentMethodForMerchant = false,
        customer = null,
        preferredMode = PreferredMode.BUSINESS // RETAIL (default), RETAIL_ONLY, BUSINESS, or BUSINESS_ONLY
    )
)Each value supports a different use case:
| Value | Behaviour | Use case |
|---|---|---|
RETAIL (default) | Prioritises the Retail flow. Customers can still switch to Revolut Business. | Checkouts aimed mainly at retail customers. |
BUSINESS | Prioritises the Business flow. Customers can still switch to Revolut Retail. | Checkouts with mostly business customers, where retail payments stay available. |
RETAIL_ONLY | Restricts the checkout to the Retail flow. Switching to Revolut Business is not offered. | Retail-only checkouts. |
BUSINESS_ONLY | Restricts the checkout to the Business flow. Switching to Revolut Retail is not offered. | B2B-only checkouts. |
Both Revolut Pay Native and Revolut Pay Lite support preferredMode. In the Business flow, the checkout redirects the customer to the first of the following that is available:
- The Revolut Business app.
- The Revolut Retail app.
- A Business web checkout opened in a WebView inside your app, where the customer signs in and completes the payment.
If Revolut Pay for Business is not enabled for your merchant account, the Business flow is skipped and the checkout opens the Retail flow regardless of preferredMode.
For the full description of the values, see: PreferredMode enumeration.
When the customer pays with a saved payment method, the checkout always opens the Retail flow regardless of preferredMode - saved payment method consent is currently supported only in the Retail flow.
Other features
Use these parameters to fine-tune the checkout to your needs: match the button to your brand's look and feel, or speed up checkout for returning customers by pre-filling their details.
To customise the look and feel of the button, configure the ButtonParams passed to the RevolutPayButton in step 4.1. For the full list of styling parameters, see: ButtonParams.
To speed up checkout for returning customers, pre-fill their details with the customer parameter in your OrderParams:
// Don't forget the additional import:
// import com.revolut.revolutpay.api.order.Customer

paymentController.pay(
    OrderParams(
        orderToken = orderToken,
        returnUri = "myapp://payment-return".toUri(),
        requestShipping = false,
        savePaymentMethodForMerchant = false,
        customer = Customer(
            name = "John Smith",
            email = "john.smith@example.com",
            phone = null,
            dateOfBirth = null,
            country = null
        )
    )
)| Parameter | Description |
|---|---|
ButtonParams | Customise the look and feel of the button: size, corner radius, colour variants, and the optional reward box. |
customer | Pre-fill the customer's details to speed up the checkout process. |
5. Handle payment result
After the customer completes or cancels the payment, the SDK delivers a PaymentResult to the callback you configured in step 4.2. This confirms the result at the UX-level only.
The authoritative payment status for your business logic - fulfilment, shipping, inventory - always arrives on your backend via webhooks, which you set up at the end of this step.
Before handling results, understand the roles of client-side results and server-side webhooks:
- Client-side callback (
PaymentResult): This is perfect for handling frontend logic, such as displaying a success message, updating the UI, or showing an error to the customer. However, its delivery is not guaranteed - it might indicate a failure even if the customer later completes the payment, for example when they initially abandon the flow or a transient issue occurs during payment processing. - Webhooks: These are server-to-server notifications that we guarantee to send for every payment status change. You must rely on webhooks for all critical backend logic, such as confirming the order, releasing digital goods, or starting the shipping process.
Never use the client-side callback as the sole trigger for critical backend logic.
Confirm payment result in UI
The callback you registered when creating the payment controller provides a PaymentResult that tells you whether the payment succeeded, failed, or was abandoned by the customer. Handle each case to show an appropriate message to the user:
when (paymentResult) {
    is PaymentResult.Success -> {
        // Present the payment confirmation UI
    }
    is PaymentResult.UserAbandonedPayment -> {
        // Return the customer to your checkout screen
    }
    is PaymentResult.Failure -> {
        // Show an error message and let the customer retry
    }
}PaymentResult case | What to do |
|---|---|
Success | Present the payment confirmation UI. Treat it as a UX-level confirmation only - fulfilment, shipping, and inventory updates should wait for the authoritative webhook. |
Failure(exception) | Show an error message and let the customer retry the payment. The exception property contains details about what went wrong. |
UserAbandonedPayment | Return the customer to your checkout screen and offer alternative payment methods. |
A Failure result is not necessarily final. The callback might indicate a failure even if the customer later completes the payment, such as when they initially abandon the flow or a transient issue occurs during payment processing.
Always verify the final payment status with your backend before treating the order as permanently failed.
Set up webhooks
Your backend must rely on webhooks as the authoritative source of payment status. The client-side callback confirms the result at the UX level only - webhooks are guaranteed, server-to-server notifications that drive your critical backend logic.
Send a POST request to the Create a webhook endpoint with your webhook URL and the events you want to subscribe to:
POST /api/webhooks HTTP/1.1
Host: merchant.revolut.com
Authorization: Bearer sk_abcdef12347890_...
Content-Type: application/json
Revolut-Api-Version: 2026-08-17

{
  "url": "https://example.com/webhooks",
  "events": [
    "ORDER_COMPLETED",
    "ORDER_AUTHORISED",
    "ORDER_PAYMENT_DECLINED",
    "ORDER_PAYMENT_FAILED",
    "ORDER_CANCELLED",
    "ORDER_FAILED"
  ]
}| Parameter | Description |
|---|---|
url | Your webhook URL. Must be a valid HTTP or HTTPS URL capable of receiving POST requests. |
events | Array of event types to subscribe to. See Webhook events for the full list. |
For detailed information on setting up webhooks, see: Use webhooks to track order and payment lifecycle.
Payment outcomes
Handle the following scenarios in your webhook handler:
The payment has been authorised by the card network or the customer's Revolut account.
Webhooks expected:
| Webhook event | Description |
|---|---|
ORDER_AUTHORISED | The payment has been authorised but not yet captured |
ORDER_COMPLETED | The payment has been captured and completed |
What to do:
- Automatic capture (default): both
ORDER_AUTHORISEDandORDER_COMPLETEDfire in quick succession. Fulfil the order onceORDER_COMPLETEDis received. - Manual capture:
ORDER_AUTHORISEDfires first. Capture the payment to complete the transaction, or cancel the order to decline.ORDER_COMPLETEDfires after you capture.
Example
For a complete, working implementation, refer to the example app included in our public SDK repository:
To run the example app:
- Clone the repository.
- Open the project in Android Studio, or your preferred IDE.
- Run the example app.
Implementation checklist
The Sandbox environment is designed to replicate the production environment's behaviour, with the key difference being the absence of app redirection due to the lack of a sandbox version of the Revolut retail app.
For more information about Revolut Pay payment flows in Sandbox, see: Test flows.
Before going live, use this checklist to test your integration in both the SANDBOX and MAIN (production) environments.
Project setup
-
mavenCentral()is inbuild.gradle. - SDK dependency is added (Revolut Pay Native or Revolut Pay Lite, depending on your chosen variant).
- (Revolut Pay Native only) SHA-256 certificate fingerprint has been obtained and shared with Revolut.
-
AndroidManifest.xml:INTERNETpermission is present. -
AndroidManifest.xml: Deep link<intent-filter>is configured with a unique scheme and host. - The deep link activity has
launchMode="singleTop". - SDK is initialised with the correct public API key and environment in your
Applicationclass.
Payment flow
- The Revolut Pay button appears correctly on the checkout screen.
- Payment controller is created and configured with result handling.
- Tapping the button successfully calls your server to create an order and receives a
token. - (Revolut Pay Native) Test case 1: The payment flow completes when the Revolut app is installed (fully native in-app path, no redirection).
- (Revolut Pay Native) Test case 2: The payment flow completes via in-app WebView (guest checkout) when the Revolut app is not installed. This path behaves similarly to Revolut Pay Lite.
- (Revolut Pay Lite) Test case 1: The payment flow correctly redirects to the Revolut retail app and back when it is installed.
- (Revolut Pay Lite) Test case 2: The payment flow completes via in-app WebView when the Revolut app is not installed.
- A successful payment shows a success message in the UI via the
PaymentResult.Successcallback. - A failed payment shows an appropriate error message in the UI via the
PaymentResult.Failurecallback. - The user cancelling the payment flow is handled gracefully via the
PaymentResult.UserAbandonedPaymentcallback. - Deep link handling is correctly implemented in your main activity's
onNewIntentmethod.
Backend verification
- Webhook endpoint is created and subscribed to events.
- Order fulfilment is triggered only by a
ORDER_COMPLETEDwebhook.
Congratulations! You've successfully implemented Revolut Pay and are ready to accept the first payment.