
Revolut's SEPA Direct Debit widget allows you to accept payments directly from your customers' EUR-denominated bank accounts, offering a seamless checkout experience for subscriptions, recurring or one-time payments across the SEPA region.
In this tutorial, we'll guide you through integrating the SEPA Direct Debit widget, powered by the Revolut Checkout Widget. Customers can securely authorise a direct debit mandate and submit payments directly from their bank account within your website, simplifying the payment process for European customers.
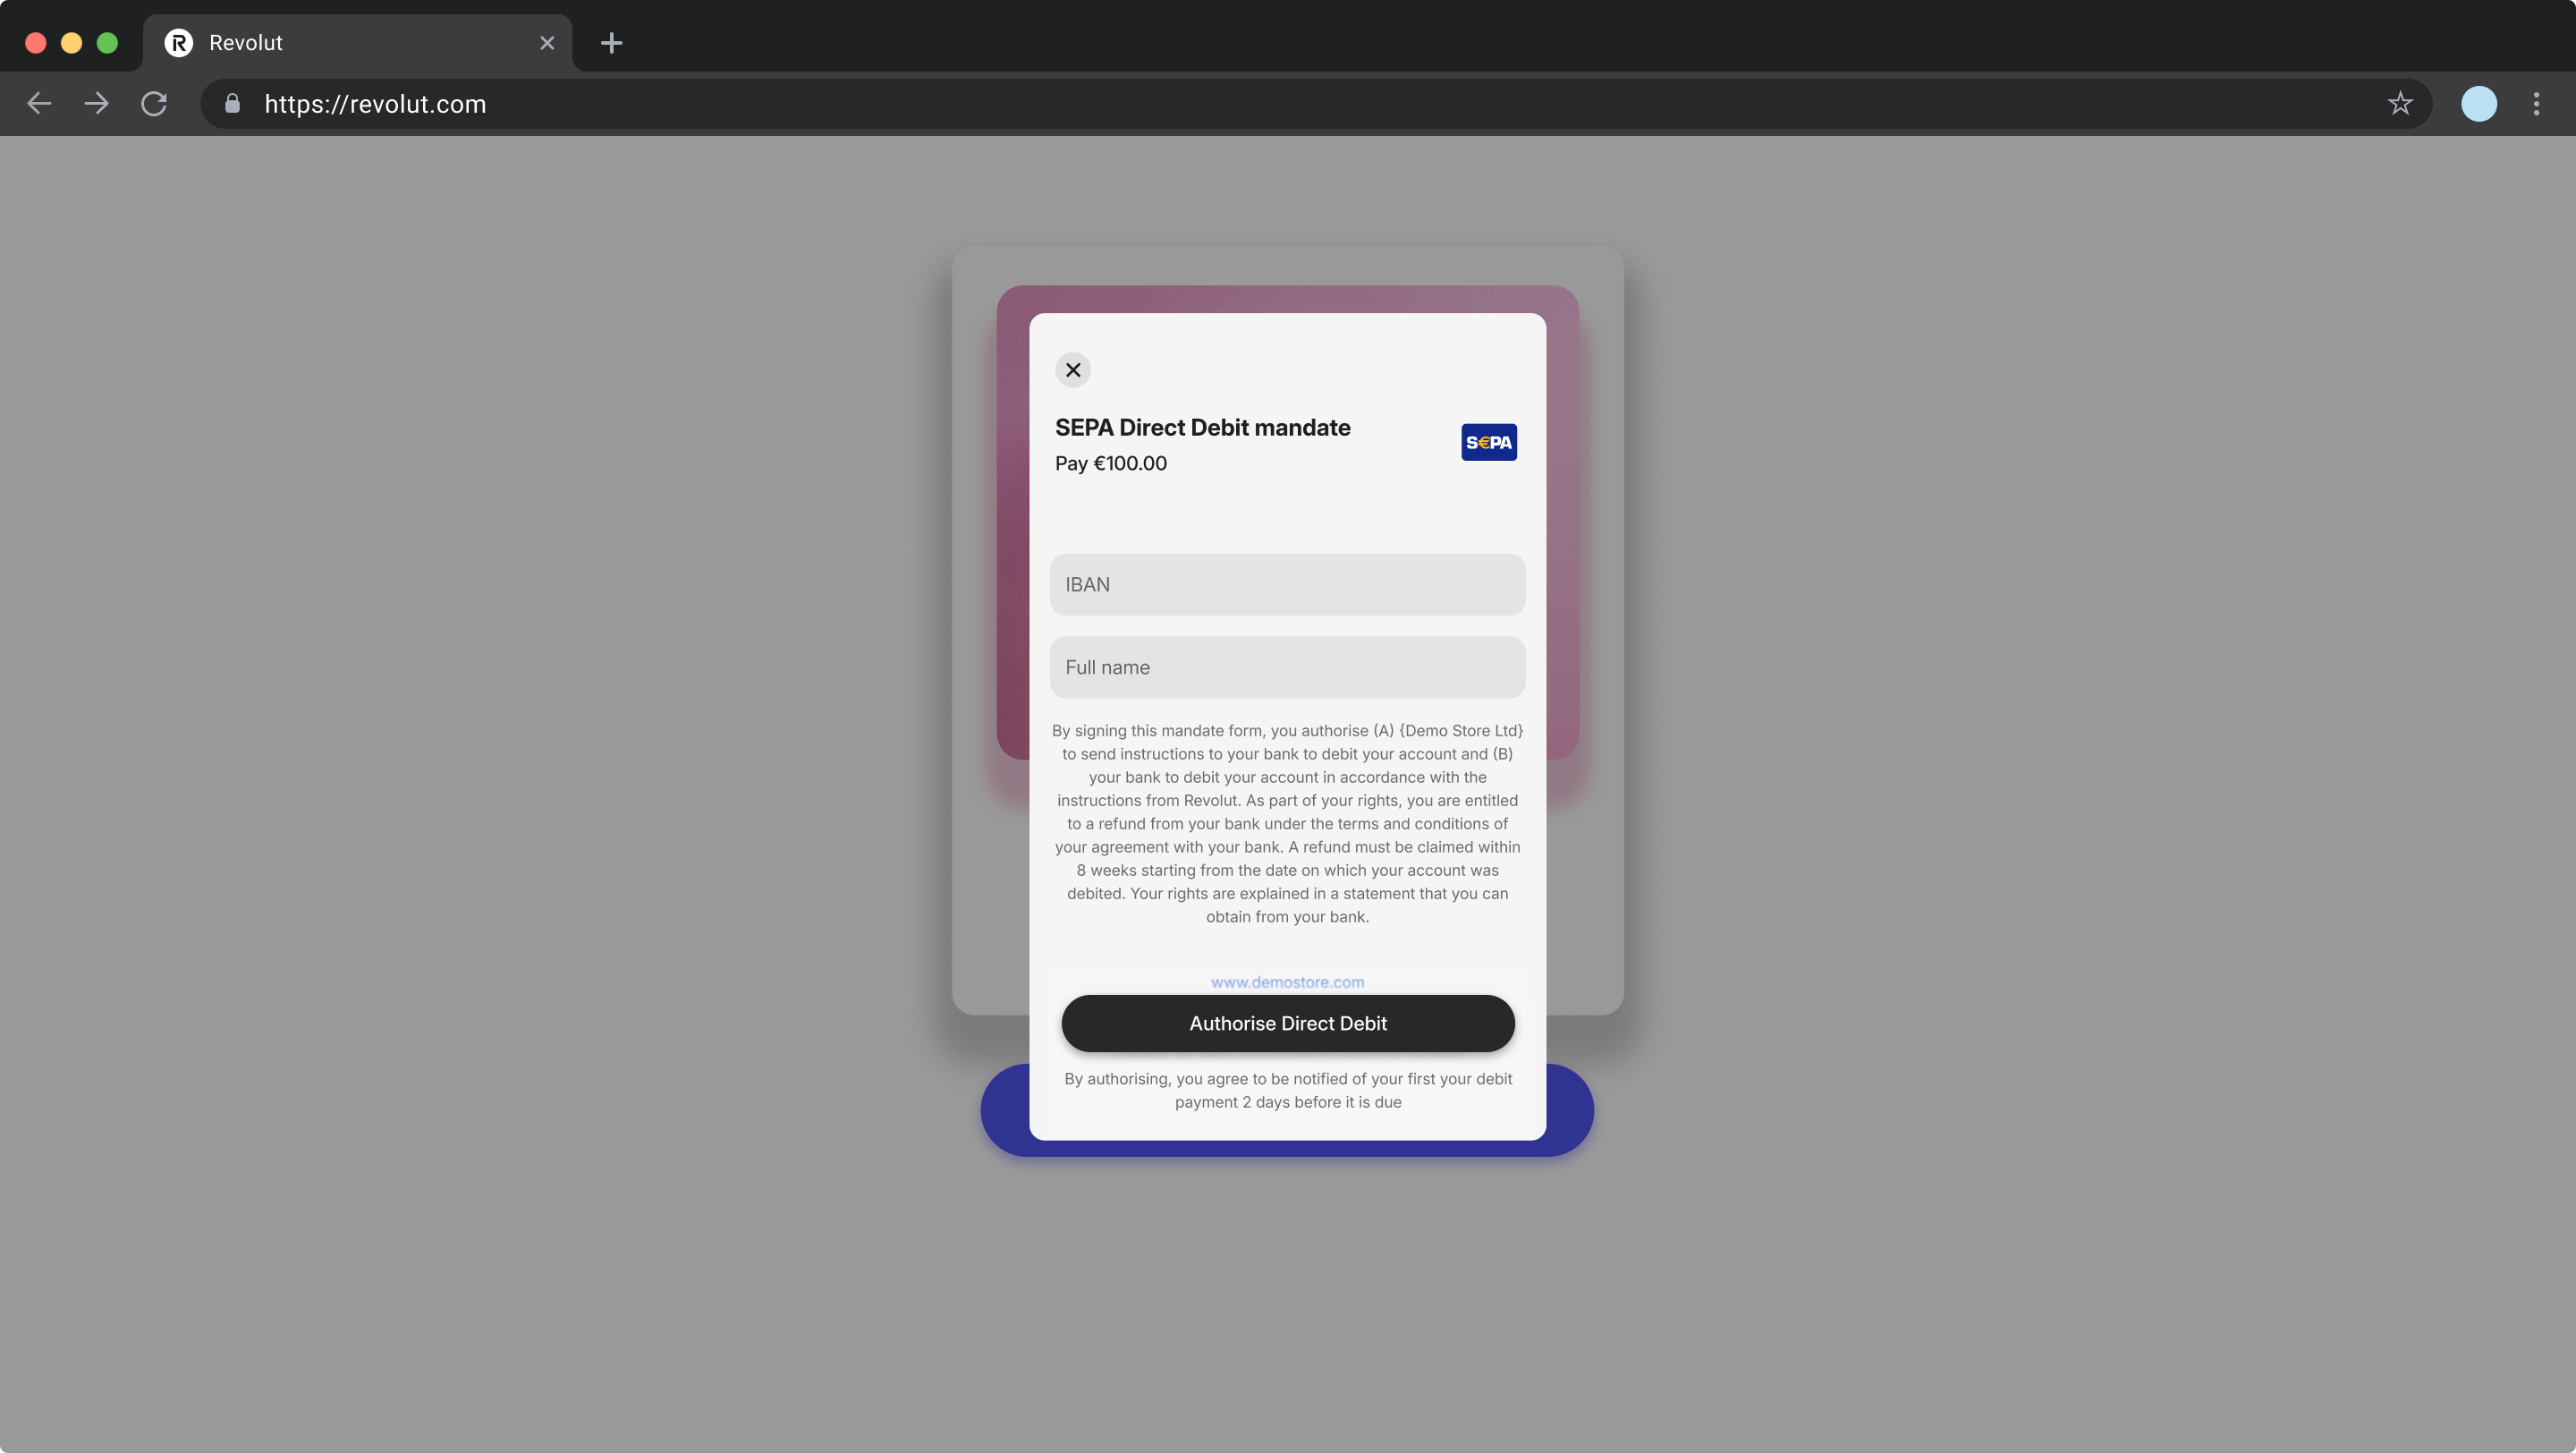
Before implementing SEPA Direct Debit, be aware of the following:
- Not enabled by default: SEPA Direct Debit must be enabled on your merchant account. Contact your account executive to request enablement.
- Country availability: SEPA Direct Debit is available in 34 of the 36 SEPA countries - all except Portugal and Ireland. See the full country list.
- EUR only: All SEPA Direct Debit payments are denominated in EUR.
- No sandbox: SEPA Direct Debit is not available in the sandbox environment. Testing requires a production merchant account with SEPA Direct Debits enabled.
- Creditor ID: You need a valid SEPA Creditor ID, which must be shared with Revolut.
What is SEPA Direct Debit
SEPA Direct Debit is a European payment scheme that lets merchants collect payments directly from customers' EUR-denominated bank accounts. Revolut supports the SEPA Direct Debit Core scheme, which covers both personal and business bank accounts across the 36-country SEPA region.
SEPA Direct Debit is mandate-based: the customer authorises a direct debit mandate once, and you can collect payments on a schedule without requiring re-authorisation for each payment. This makes it a popular choice for subscriptions, recurring billing, and one-time payments in the European market.
Key characteristics of the scheme:
- EUR only: all SEPA Direct Debit payments are denominated in EUR.
- Asynchronous settlement: payments are submitted to the SEPA scheme and settle over several business days (up to 5).
- Mandate-driven: each payment is backed by a signed mandate. You are responsible for mandate management and pre-debit notifications as required by SEPA rules.
How it works
Implementing the SEPA Direct Debit widget involves these core components:
- Server-side: expose an endpoint on your backend that creates an order using the Merchant API: Create an order endpoint.
- Client-side: the SEPA Direct Debit widget collects the customer's IBAN and mandate consent, uses your endpoint to create the order, and submits the payment to the SEPA scheme.
- Webhook endpoint: set up webhooks to monitor payment lifecycle events. SEPA Direct Debit payments are fully asynchronous - payment outcomes can arrive up to 5 business days after submission. Webhooks are mandatory - at minimum, subscribe to
ORDER_PAYMENT_AUTHORISATION_STARTEDto receive mandate details for pre-notification, andORDER_COMPLETEDfor final settlement confirmation.
The order and payment flow is as follows:
- The customer goes to the checkout page, chooses to pay via SEPA Direct Debit and clicks the payment button.
- The widget opens the SEPA Direct Debit pop-up and calls your
createOrderfunction to create the order via your backend in the background. - The customer enters their IBAN and provides mandate consent in the pop-up.
- The widget submits the payment to the SEPA scheme.
- The payment enters
processingstate - this is the final client-side state, notcompleted. - The
onSuccesscallback fires - this signals that the payment has been submitted, not that it has settled. - Your server receives the
ORDER_PAYMENT_AUTHORISATION_STARTEDwebhook event. - You pull the mandate reference and IBAN details from the Retrieve an order endpoint.
- You must send the mandate confirmation and pre-notification to the customer as required by SEPA rules. Failure to send these notifications may result in payment disputes.
- The payment settles asynchronously - this can take up to 5 business days.
- Your server receives a final webhook event:
ORDER_COMPLETED(orORDER_PAYMENT_DECLINED/ORDER_PAYMENT_FAILED/ORDER_CANCELLEDif unsuccessful).
For more information about the order and payment lifecycle, see: Order and payment lifecycle.
Asynchronous settlement
Unlike card payments, the final client-side state for SEPA Direct Debit is processing, not completed. The onSuccess callback fires when the payment is submitted, not when it settles.
Key points to keep in mind:
- Settlement can take up to 5 business days after submission.
- Authorisation started does not guarantee payment completion - the debtor's bank can still return the payment within the refusal window.
- Fulfil orders only after receiving the
ORDER_COMPLETEDwebhook event. - If the payment fails after authorisation has started, you can retry using the saved payment method - the payment method is saved by default (
isRecurringPaymentdefaults totrue). See Step 5: Handle payment results.
Pre-notification handling
In the SDK flow, Revolut ensures that debtors agree to receive pre-notifications 2 days before payment during the widget interaction. However, you are still responsible for actually sending the mandate confirmation and pre-notification after the payment authorisation started.
After a successful mandate submission:
- Pull the mandate reference and IBAN details from the order or payment details.
- Send the mandate confirmation and pre-notification to the customer as per SEPA rules.
As part of SEPA compliance, you are responsible for sending mandate confirmations and pre-notifications to your customers. Revolut does not send these on your behalf.
For full regulatory requirements - mandate management and pre-notification content - see Regulatory responsibilities.
Implementation overview
Here is an overview of the key integration steps:
- Set up an endpoint for creating orders
- Install the SDK
- Initialise the SDK
- Configure and mount the widget
- Handle payment results
Before you begin
Make sure you've completed the following:
- Apply for a Merchant account
- Generate the API keys
- Contacted your account executive to have SEPA Direct Debits enabled on your merchant account (not enabled by default)
- Obtained a valid SEPA Creditor ID
- Shared your Creditor ID with Revolut
- Set up a process to send pre-debit notifications to customers as required by SEPA rules
- Confirmed your target markets are supported - see the country availability list
Implement SEPA Direct Debit
The following steps walk you through the full integration: setting up your backend to create orders, installing and initialising the SDK, configuring and mounting the SEPA Direct Debit widget, and handling payment results - including the mandatory webhook pipeline for asynchronous settlement.
1. Set up an endpoint for creating orders
Before implementing the client-side widget, you must first create a dedicated endpoint on your server. This is a critical security step, as your secret API key must never be exposed on the client side.
The role of this server-side endpoint is to act as a secure bridge between your frontend and the Merchant API. When a customer initiates a payment on your website, your frontend will call this endpoint. Your endpoint is then responsible for:
- Receiving the checkout details (e.g.,
amount,currency) from the frontend request. - Securely calling the Merchant API: Create an order endpoint with the received details.
- Receiving the order details from the Merchant API, including the public
token. - Passing this
tokenback to your frontend in the response.
Later, in the client-side SDK configuration, the createOrder callback function will call this endpoint to fetch the token, which is required to initialise the checkout widget.
Send a POST request to the Create an order endpoint with the order details, including your Secret API key in the authorisation header:
POST /api/orders HTTP/1.1
Host: merchant.revolut.com
Authorization: Bearer sk_abcdef12347890_...
Content-Type: application/json

{
  "amount": 1000,
  "currency": "EUR",
  "customer": {
    "email": "customer@example.com"
  }
}SEPA Direct Debit payments are denominated in EUR only.
| Parameter | Description | Required |
|---|---|---|
amount | The order amount in minor currency unit (e.g., cents). For €10.00, use 1000. | Yes |
currency | Must be EUR for SEPA Direct Debit payments. | Yes |
customer | Customer details. Pass email for new customers or id for existing customers. Required when isRecurringPayment is true (default) to save the payment method for MIT. Optional for one-time payments. | Yes* |
* Required when isRecurringPayment is true (default). Optional for one-time payments where isRecurringPayment is false.
For complete details on all available parameters, see: Merchant API: Create an order.
2. Install the SDK
Before you begin working with the SDK, ensure the Revolut Checkout Widget is installed in your project. This widget is a necessary component to create and configure the SEPA Direct Debit widget. You can install the widget via your project's package manager.
npm install @revolut/checkoutyarn add @revolut/checkoutpnpm add @revolut/checkoutbun add @revolut/checkoutAlternatively, you can add the widget to your code base by adding the embed script to your page directly. To learn more, see: Installation.
3. Initialise the SDK
Use the RevolutCheckout.payments() module's sepaDirectDebit instance with your Merchant API Public key to initialise the widget.
import RevolutCheckout from '@revolut/checkout'

const { sepaDirectDebit } = await RevolutCheckout.payments({
  publicToken: 'pk_abcdef12347890_...', // Merchant public API key
  mode: 'prod',
})

// Configuration code will go here| Parameter | Description | Type | Required |
|---|---|---|---|
publicToken | Your Merchant API public key | string | Yes |
mode | API environment. Default: 'prod' | 'prod' | 'sandbox' | No |
locale | Widget language (defaults to 'auto' for automatic detection) | Locale | No |
For more information about the RevolutCheckout.payments() module, see: Payments module
4. Configure and mount the widget
Prepare your checkout page by adding a button that users click to initiate the payment, then invoke the sepaDirectDebit({ ... }) instance with your configuration parameters and call the .show() method to open the SEPA Direct Debit pop-up.
4.1 Add a DOM element
First, add a button to your checkout page where you want the widget to appear. This can be a standalone button, or it can be triggered from a payment method selector - for example, the customer selects SEPA Direct Debit from a list of payment options, then clicks a pay button that triggers this button's click handler.
<!-- ... -->

<button id="sepa-direct-debit-button">Pay by SEPA Direct Debit</button>

<!-- ... -->4.2 Set up the click handler
Attach a click handler to your button. For now, this is just a placeholder - you'll add the widget configuration in the next step.
import RevolutCheckout from '@revolut/checkout'

const { sepaDirectDebit } = await RevolutCheckout.payments({
  publicToken: 'pk_abcdef12347890_...', // Merchant public API key
  mode: 'prod',
})

const sepaDirectDebitButton = document.getElementById('sepa-direct-debit-button')

sepaDirectDebitButton.addEventListener('click', async () => {
  // Widget configuration will go here
})4.3 Configure the widget
Invoke the sepaDirectDebit({ ... }) instance inside the click handler with your configuration parameters, and call .show() to open the SEPA Direct Debit pop-up.
import RevolutCheckout from '@revolut/checkout'

const { sepaDirectDebit } = await RevolutCheckout.payments({
  publicToken: 'pk_abcdef12347890_...', // Merchant public API key
  mode: 'prod',
})

const sepaDirectDebitButton = document.getElementById('sepa-direct-debit-button')

sepaDirectDebitButton.addEventListener('click', async () => {
  const instance = sepaDirectDebit({
    createOrder: async () => {
      // Call your backend here to create an order and return order.token
      const order = await yourServerSideCall()
      return { publicId: order.token }
    },
  })

  instance.show()
})| Code snippet | Description |
|---|---|
RevolutCheckout.payments(...) | Initialises the Revolut Checkout payments module and returns an object containing the sepaDirectDebit factory. Pass your publicToken and mode here. |
sepaDirectDebit | Creates a SEPA Direct Debit instance when called with your options. It returns a SepaDirectDebitInstance. |
SepaDirectDebitInstance | The instance returned by sepaDirectDebit. It exposes .show() to open the mandate collection pop-up and .destroy() to remove any rendered UI and clean up. |
createOrder | A function you define to send order details like amount, currency from your frontend to your backend. Your backend then calls Merchant API: Create an order, receives the token, and returns { publicId: order.token } to the widget, so it can start the checkout session. |
| Instance methods | Call .show() to open the SEPA Direct Debit pop-up. Call .destroy() to close the widget and clean up resources. |
For more details about the available parameters, see: Merchant Web SDK: SEPA Direct Debit.
Additional settings
The sepaDirectDebit module of the Revolut Checkout Widget offers several options that allow for a customised checkout experience. Here are some additional settings you can leverage:
-
Merchant-initiated transactions:
isRecurringPaymentdefaults totrue, meaning the payment method is saved for the merchant after a successful payment. This enables merchant-initiated transactions (MIT) - retries and recurring charges - via the Merchant API (POST /api/payments) without requiring the customer to re-enter their IBAN. Set tofalsefor one-time payments where the method should not be retained.
-
Billing address:
- Pass the
billingAddressparameter to pre-fill the customer's billing address in the widget. If the address is valid (countryCode,postcode,streetLine1,city), the billing form is hidden. Accepts anAddressobject with fields likecountryCode,region,city,streetLine1,streetLine2, andpostcode.
- Pass the
5. Handle payment results
SEPA Direct Debit payments are processed asynchronously. The client-side callbacks provide immediate feedback to the customer, but the final payment outcome arrives via webhooks - this can take up to 5 business days.
Client-side callbacks
The widget is configured and mounted. Add the event callbacks to handle the payment results. Add onSuccess, onError, and onCancel inside the sepaDirectDebit({...}) configuration object:
import RevolutCheckout from '@revolut/checkout'

const { sepaDirectDebit } = await RevolutCheckout.payments({
  publicToken: 'pk_abcdef12347890_...', // Merchant public API key
  mode: 'prod',
})

const sepaDirectDebitButton = document.getElementById('sepa-direct-debit-button')

sepaDirectDebitButton.addEventListener('click', async () => {
  const instance = sepaDirectDebit({
    createOrder: async () => {
      // Call your backend here to create an order and return order.token
      const order = await yourServerSideCall()
      return { publicId: order.token }
    },

    onSuccess: ({ orderId }) => {
      // Payment has been submitted - not yet settled
      console.log('Payment submitted!', orderId)
      window.location.href = `/processing?orderId=${orderId}`
    },

    onError: ({ error, orderId }) => {
      console.error('Payment failed:', error.message, orderId)
      alert(`Payment failed: ${error.message}`)
    },

    onCancel: ({ orderId }) => {
      console.log('Payment cancelled', orderId)
      alert('Payment was cancelled.')
    },
  })

  instance.show()
})| Callback | Description |
|---|---|
onSuccess | Fires when the payment is submitted - not when it settles. Redirect to a "payment processing" page, not a confirmation page. Settlement can take up to 5 business days. |
onError | Fires when an error occurs. Receives RevolutCheckoutError. Use it to display error messaging, log diagnostics, or prompt the user to try again. |
onCancel | Fires when the user cancels the payment. orderId may be undefined if order creation failed. Use it to re-enable the checkout form or track abandonment. |
Widget callbacks are not guaranteed to fire due to network issues, browser closures, or ad-blockers. Always use webhooks for critical backend operations like order fulfilment.
Webhooks (mandatory)
For SEPA Direct Debit, webhooks are mandatory. Set up your backend to receive and process webhooks before you go live. SEPA Direct Debit is fully asynchronous - payment outcomes can arrive up to 5 business days after submission.
Subscribe to the following events via the Create a webhook endpoint:
Send a POST request to the Create a webhook endpoint with your webhook URL and the events you want to subscribe to:
POST /api/webhooks HTTP/1.1
Host: merchant.revolut.com
Authorization: Bearer sk_abcdef12347890_...
Content-Type: application/json

{
  "url": "https://example.com/webhooks",
  "events": [
    "ORDER_AUTHORISED",
    "ORDER_COMPLETED",
    "ORDER_PAYMENT_DECLINED",
    "ORDER_PAYMENT_FAILED",
    "ORDER_CANCELLED",
    "ORDER_FAILED",
    "ORDER_PAYMENT_AUTHORISATION_STARTED"
  ]
}| Parameter | Description | Required |
|---|---|---|
url | Your webhook URL. Must be a valid HTTP or HTTPS URL capable of receiving POST requests. | Yes |
events | Array of event types to subscribe to. See Webhook events for the full list. | Yes |
For detailed information on setting up webhooks, see: Use webhooks to track order and payment lifecycle.
Payment outcomes
Handle the following scenarios:
The payment has been submitted to the SEPA scheme. This is the key event for SEPA Direct Debit - it signals that the customer has provided their IBAN and mandate consent, and the debit instruction has been queued.
Webhook expected:
| Webhook event | Description |
|---|---|
ORDER_PAYMENT_AUTHORISATION_STARTED | The payment has been submitted to the SEPA scheme |
What to do:
-
Pull the mandate reference and IBAN details from the Retrieve an order endpoint. Check for the following fields in
payments[].payment_method:Field Description mandate_referenceThe unique mandate reference number generated by Revolut debtor_iban_last_fourThe last 4 digits of the customer's IBAN debtor_nameThe account holder's name -
Send the mandate confirmation and pre-notification to the customer as per SEPA rules.
In the SDK flow, Revolut ensures that debtors agree to receive pre-notifications 2 days before payment during the widget interaction.
However, you are still responsible for actually sending the mandate confirmation and pre-notification after receiving this webhook event. Revolut does not send pre-notifications on your behalf.
Regulatory responsibilities
SEPA rules impose obligations on you before and after initiating any direct debit. You are fully responsible for compliance - Revolut collects mandate consent through the widget but does not store mandate records or send pre-notifications on your behalf.
Mandate management:
| Requirement | Details |
|---|---|
| Mandatory fields | Debtor name, IBAN, creditor identifier, mandate reference, customer consent |
| Storage | Store mandate records securely for as long as they remain valid and for at least 14 months after the last collection |
| Mandate reference | Revolut generates a unique mandate reference number and returns it in the payment response. Use this reference in pre-debit notifications sent to your customers. |
| Audit readiness | Be prepared to provide proof of mandate authorisation if challenged by the debtor's bank |
Pre-notification requirements:
In the SDK flow, customers agree to receive pre-notifications 2 days before payment during the widget interaction. You must send the pre-notification at least 2 calendar days before each debit date.
Each notification must include:
| Required content | Details |
|---|---|
| Last 4 digits of IBAN | The last 4 digits of the debtor's bank account number |
| Mandate reference | The unique reference number of the mandate |
| Debit amount | The amount to be debited |
| Creditor identifier | Your SEPA creditor identifier |
| Contact information | Your business contact details |
For subscriptions with fixed amounts and regular dates, a single pre-notification can cover multiple future collections if the schedule is clearly communicated.
If anything in the mandate changes, you must collect a new mandate from the customer. Revolut does not support mandate updates.
Examples
Example with minimal required parameters
import RevolutCheckout from '@revolut/checkout'

const { sepaDirectDebit } = await RevolutCheckout.payments({
  publicToken: 'pk_abcdef12347890_...', // Merchant public API key
  mode: 'prod',
})

const sepaDirectDebitButton = document.getElementById('sepa-direct-debit-button')

sepaDirectDebitButton.addEventListener('click', async () => {
  const instance = sepaDirectDebit({
    createOrder: async () => {
      // Call your backend here to create an order and return order.token
      const order = await yourServerSideCall()
      return { publicId: order.token }
    },

    onSuccess: ({ orderId }) => {
      console.log('Payment submitted!', orderId)
      window.location.href = `/processing?orderId=${orderId}`
    },

    onError: ({ error, orderId }) => {
      console.error('Payment failed:', error.message, orderId)
      alert(`Payment failed: ${error.message}`)
    },
  })

  instance.show()
})Example with additional parameters
import RevolutCheckout from '@revolut/checkout'

const { sepaDirectDebit } = await RevolutCheckout.payments({
  publicToken: 'pk_abcdef12347890_...', // Merchant public API key
  mode: 'prod',
})

const sepaDirectDebitButton = document.getElementById('sepa-direct-debit-button')

sepaDirectDebitButton.addEventListener('click', async () => {
  const instance = sepaDirectDebit({
    createOrder: async () => {
      // Call your backend here to create an order and return order.token
      const order = await yourServerSideCall()
      return { publicId: order.token }
    },

    billingAddress: {
      countryCode: 'DE',
      region: 'Berlin',
      city: 'Berlin',
      streetLine1: 'Musterstraße 1',
      streetLine2: '',
      postcode: '10115',
    },

    isRecurringPayment: true, // default - saved for MIT

    onSuccess: ({ orderId }) => {
      console.log('Recurring payment submitted!', orderId)
      window.location.href = `/processing?orderId=${orderId}`
    },

    onError: ({ error, orderId }) => {
      console.error('Payment failed:', error.message, orderId)
      alert(`Payment failed: ${error.message}`)
    },

    onCancel: ({ orderId }) => {
      console.log('Payment cancelled', orderId)
      alert('Payment was cancelled.')
    },
  })

  instance.show()
})Example: One-time payment
By default, isRecurringPayment is true and the payment method is saved for the merchant. For one-time payments where the method should not be retained, set isRecurringPayment: false:
import RevolutCheckout from '@revolut/checkout'

const { sepaDirectDebit } = await RevolutCheckout.payments({
  publicToken: 'pk_abcdef12347890_...', // Merchant public API key
  mode: 'prod',
})

const sepaDirectDebitButton = document.getElementById('sepa-direct-debit-button')

sepaDirectDebitButton.addEventListener('click', async () => {
  const instance = sepaDirectDebit({
    createOrder: async () => {
      const order = await yourServerSideCall()
      return { publicId: order.token }
    },

    isRecurringPayment: false, // one-time - payment method won't be saved

    onSuccess: ({ orderId }) => {
      console.log('Payment submitted!', orderId)
      window.location.href = `/processing?orderId=${orderId}`
    },

    onError: ({ error, orderId }) => {
      console.error('Payment failed:', error.message, orderId)
      alert(`Payment failed: ${error.message}`)
    },
  })

  instance.show()
})Implementation checklist
SEPA Direct Debit is not available in the Sandbox environment. Integration testing requires a production merchant account with SEPA Direct Debits enabled.
Before deploying your SEPA Direct Debit implementation to your live website, complete the checklist below to ensure everything works as expected in the production environment.
General checks
-
SEPA Direct Debit widget pop-up opens correctly when the customer clicks the payment button.
-
Your backend creates the order successfully when the widget is triggered.
-
Widget successfully calls
createOrderfunction to fetch and use the ordertoken. -
IBAN and mandate consent collection screen displays correctly in the widget.
-
Payment submission flow:
- Customer can enter their IBAN and provide mandate consent.
- Payment is submitted successfully and
onSuccesscallback fires. - Customer is redirected to a "payment processing" page (not a confirmation page).
-
Error handling works as expected:
- Failed payments trigger the error callback (
onError). - Customer sees appropriate error messaging.
- Cancel callback (
onCancel) is triggered when payment is abandoned.
- Failed payments trigger the error callback (
Webhook verification
- Webhook endpoint is set up to receive order and payment updates.
- Webhook subscription created with
ORDER_PAYMENT_AUTHORISATION_STARTED,ORDER_AUTHORISED,ORDER_COMPLETED,ORDER_PAYMENT_DECLINED,ORDER_PAYMENT_FAILED,ORDER_CANCELLED, andORDER_FAILEDevents. -
ORDER_COMPLETEDwebhook event is received when payment settles successfully. - Your backend only fulfils orders after receiving the
ORDER_COMPLETEDwebhook event. - Mandate reference and IBAN details are retrieved from the Retrieve an order endpoint after authorisation.
- Webhook signature verification is implemented for security.
SEPA Direct Debit specific checks
- All orders are created with
currency: "EUR"(EUR-only restriction enforced). - Country availability confirmed for target markets - see the country availability list.
- Mandate confirmation and pre-notification emails are sent to the customer after
ORDER_PAYMENT_AUTHORISATION_STARTEDis received. - Pre-debit notifications include: last 4 digits of IBAN, mandate reference, debit amount, creditor identifier, and contact information.
- Pre-notifications are sent at least 2 calendar days before each debit (SDK flow).
- Payment methods are saved by default (
isRecurringPaymentdefaults totrue) for MIT. If one-time payments are needed,isRecurringPayment: falseis set correctly. - Orders include
customerdetails (email for new customers, oridfor existing) whenisRecurringPaymentistrueto save the payment method for MIT. - Backend logic is implemented for failed payments and retries after authorisation.
- Mandates are stored securely for at least 14 months after the last collection.
Once your implementation passes all the checks in the production environment, you can confidently deploy it to your live website.
These checks only cover the implementation path described in this tutorial. If your application handles more features of the Merchant API, see the Implementation checklists.
Congratulations! You've successfully implemented SEPA Direct Debit and are ready to accept direct debit payments from your customers.