
The Revolut Tap to Pay SDK for iOS allows merchants to accept contactless payments directly on iPhone using Apple's Tap to Pay technology. This guide covers the client-side integration: installing the SDK, implementing the token provider, initialising the SDK, and accepting payments.
The SDK wraps Apple's ProximityReader framework and Revolut's payment infrastructure into a single integration. It handles device pairing, order creation, payment processing, and UI presentation - your app provides the token provider and calls the payment methods.
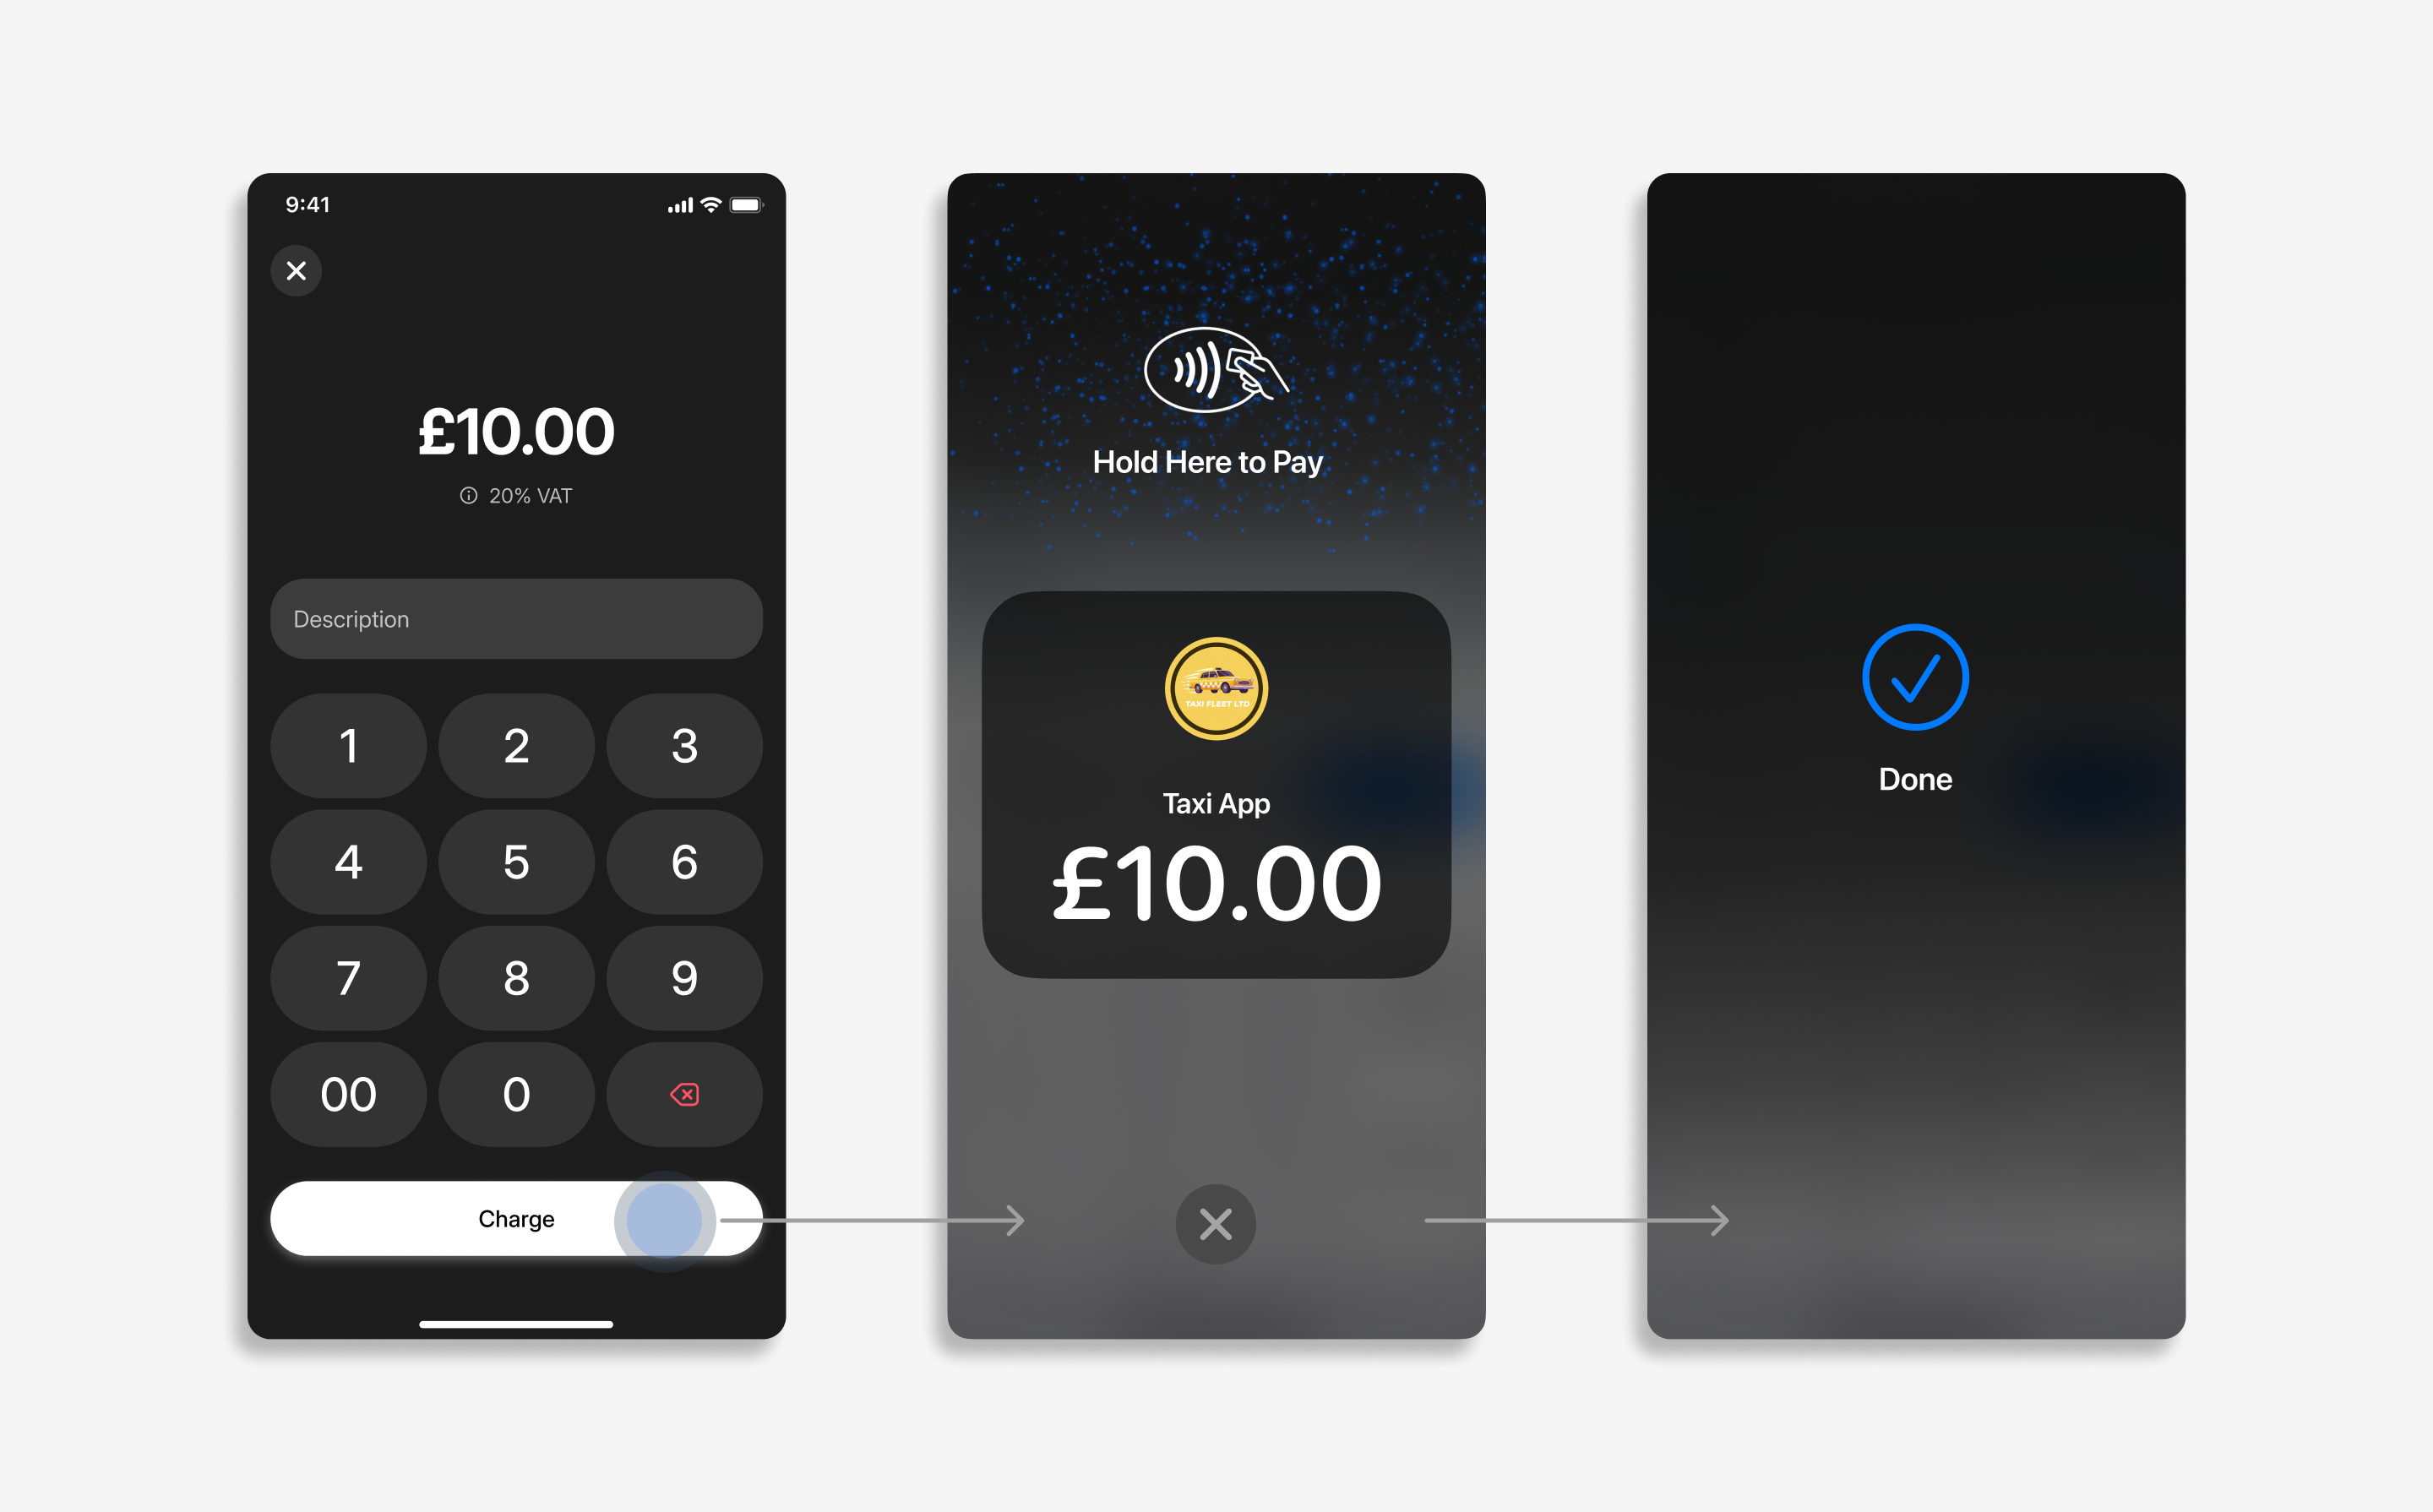
Tap to Pay is not currently supported in the sandbox environment. Real transactions must be made to test your implementation in the production environment.
How it works
From an implementation perspective, the Tap to Pay SDK works with the following components:
- Server-side: Your server holds the merchant's long-lived OAuth tokens and provides short-lived device tokens to the iPhone app. For setup details, see Get started.
- Client-side: The SDK (
RevolutTapToPayKit) is initialised with a token provider that fetches short-lived device tokens from your backend. The SDK handles Apple ProximityReader pairing, Card Reader Token management, order creation, payment processing, and presents the payment UI. - Endpoint for webhooks: Set up an endpoint to receive webhook events from the Merchant API to track the payment lifecycle. Webhooks are the only reliable way to get the final, authoritative payment status - client-side callbacks are for UI updates only. For more information, see: Use webhooks to keep track of the payment lifecycle.
The payment flow works as follows:
- Your app calls the SDK to start a payment session with an amount and currency.
- The SDK requests a short-lived device token from your backend via the token provider.
- The SDK handles Apple
ProximityReaderpairing and Card Reader Token management. - The SDK creates an order and processes the payment through Revolut's infrastructure.
- The customer taps their contactless card or digital wallet on the iPhone.
- The SDK returns the payment result and an optional receipt to your app.
- Your server receives webhook notifications to confirm the final payment state.
The SDK offers two payment methods: Tap to Pay (contactless card or wallet) and QR code. In performPayments (multi-payment mode), the merchant chooses between them for each transaction. In performPayment (single payment), the SDK uses Tap to Pay and automatically falls back to QR code if contactless isn't available.
For more information about the order and payment lifecycle, see: Order and payment lifecycle.
What the SDK handles
The SDK manages the following internally - you should not call these endpoints directly:
| Responsibility | Description |
|---|---|
| Device pairing | Tap to Pay device and reader pairing with Apple's ProximityReader framework. |
| Card Reader Token | Card Reader Token handling and lifecycle management. |
| Payment flow | Creating and managing the Revolut payment flow - order creation, processing, and status tracking. |
| Payment UI | Presenting the payment UI (the SDK presents its own view controllers - you don't need to provide a presenting controller). |
| Payment result | Tracking the payment status and returning the final result to your app. |
| QR code payments | QR code as a primary payment option in performPayments, and as an automatic fallback in performPayment when contactless isn't available. |
What your app handles
Your app remains responsible for the user experience around the SDK:
| Responsibility | Description |
|---|---|
| Token provider | Implementing TokenProviderProtocol to request short-lived device tokens from your backend. |
| SDK initialisation | Initialising the SDK with the token provider and onLogout handler. |
| Payment sessions | Starting a payment session with amount, currency, and reference details. |
| User feedback | Displaying SDK prompts, errors, cancellations, and final payment outcomes to the merchant. |
| State management | Updating your own order, basket, or POS state after the SDK returns the result. |
Implementation overview
- Set up the Apple entitlement
- Install the SDK
- Implement the token provider
- Initialise the SDK
- First-time setup (optional)
- Receive payments
- Handle payment results
Before you begin
Before you start this tutorial, ensure you have completed the Get started guide and have the following:
- Your application is registered and submitted to production in the Developer Portal
- The merchant has
API & integrationspermission enabled on their Revolut Business account - Your backend serves short-lived device tokens to the iOS app (
grant_type=exchange_token) - Your backend can refresh the merchant's OAuth tokens when they expire (
grant_type=refresh_token) - Apple
ProximityReaderentitlement requested and approved
Integrate the Tap to Pay SDK
The following steps walk you through the client-side integration: setting up the Apple entitlement, installing the SDK, implementing the token provider that connects to your backend, initialising the SDK, and accepting payments.
1. Set up the Apple entitlement
Before the SDK can use Apple's Tap to Pay on iPhone technology, you must set up the ProximityReader entitlement in your Apple Developer account and add it to your Xcode project.
-
Follow Apple's guide to set up the entitlement for Tap to Pay on iPhone.
-
Add the entitlement to your app's capabilities in Xcode under Signing & Capabilities.
RevolutTapToPayApp.entitlementscom.apple.developer.proximity-reader.payment.acceptance
Without this entitlement, the SDK cannot pair with the device's payment reader and all payment methods will fail.
2. Install the SDK
The minimum supported iOS version is 16.4.
We recommend using CocoaPods to integrate the SDK into your Xcode project.
-
Ensure you have the latest version of CocoaPods installed.
-
If your project doesn't have a
Podfileyet, create one by running:pod init -
Add the following line to your
Podfile:Podfilepod 'RevolutPayments/RevolutTapToPay' -
At the end of your
Podfile, add this configuration:Podfilepost_install do |installer| installer.generated_projects.each do |project| project.targets.each do |target| target.build_configurations.each do |config| config.build_settings['IPHONEOS_DEPLOYMENT_TARGET'] = '16.4' end end end end -
Install the dependencies:
pod install -
From now on, open your project using the
.xcworkspacefile rather than the.xcodeprojfile. -
To ensure the SDK uses the latest version, run:
pod update RevolutPayments/RevolutTapToPayTo update the SDK to a newer version re-run this command.
3. Implement the token provider
The SDK needs an access token to authenticate its API calls. Instead of receiving a static credential, the SDK calls a TokenProviderProtocol implementation whenever it needs a fresh token. Your implementation depends on which integration architecture you chose:
Your backend produces short-lived device tokens using grant_type=exchange_token (see Get started: 3. Get a device token). Your TokenProviderProtocol implementation calls your backend endpoint and passes the device token back to the SDK:
import RevolutTapToPay

final class TokenProvider: TokenProviderProtocol {
    func fetchAccessToken() async throws -> SdkTokenApiDto {
        // Call your backend endpoint that returns a short-lived device token.
        // Your backend uses `grant_type=exchange_token` to obtain it
        // from the merchant's OAuth `access_token` (see Get started: Step 3).
        let response = try await backendClient.fetchDeviceToken()
        return SdkTokenApiDto(accessToken: response.accessToken)
    }
}| Code | Description |
|---|---|
import RevolutTapToPay | Imports the SDK module. |
TokenProviderProtocol | The protocol the SDK uses to request tokens. Your type must conform to it and implement fetchAccessToken(). |
fetchAccessToken() | The method the SDK calls when it needs a fresh device token - either on the first API call or after receiving an unauthorised error. |
backendClient.fetchDeviceToken() | Your backend call - replace with your actual networking code. Your backend should use grant_type=exchange_token to obtain a device token from the merchant's OAuth access_token. |
SdkTokenApiDto | The wrapper struct that holds the device token. The SDK reads accessToken from it for pairing and payment API calls. |
response.accessToken | The short-lived device token returned by your backend. |
When the SDK requests a new token
The SDK calls fetchAccessToken() in two situations:
- First API call - no token has been provided yet.
- Token expired - the SDK received an unauthorised error, meaning the current device token is no longer valid.
If the SDK receives two unauthorised errors in a row, it calls the onLogout handler provided during initialisation. This means the merchant is no longer authorised - consent was revoked, not granted, or the app permission was removed in the Developer Portal. The SDK cannot continue operating with that merchant account. Stop SDK usage and prompt the merchant to re-authorise via the OAuth consent flow, or fall back to other payment methods.
4. Initialise the SDK
Create an instance of RevolutTapToPayKit - the main entry point to all SDK flows. Create it where it's accessible to the code that triggers payments - for example, as a property on a view model or a shared service. You only need one instance per app session.
import RevolutTapToPay

final class MenuViewModel {
    private lazy var tapToPayKit = RevolutTapToPayKit(
        clientId: Config.clientId,
        environment: .production,
        tokenProvider: TokenProvider(),
        onLogout: {
            // The merchant is no longer authorised to use the SDK.
            // This means consent was revoked, not granted, or the app
            // permission was removed in the Developer Portal.
            // Stop SDK usage and prompt the merchant to re-authorise
            // via the OAuth consent flow, or fall back to other payment methods.
        }
    )
}| Code | Description |
|---|---|
lazy var tapToPayKit = RevolutTapToPayKit(...) | Creates the SDK instance stored as a property on your view model. Using lazy ensures it's initialised on first access. Store it wherever your payment-triggering code can reach it - you only need one instance per app session. |
clientId | Identifier of your application provided by Revolut - the same client ID from Get started: Step 1. Must match the environment you select. |
environment | Determines which Revolut API endpoints the SDK calls. Only .production is currently available. |
TokenProvider() | Your token provider implementation from Step 3 - connects the SDK to your backend's device token endpoint. |
onLogout | Called when the merchant is no longer authorised - consent was revoked, not granted, or the app permission was removed in the Developer Portal. The SDK cannot continue operating with that merchant account. Stop SDK usage and prompt the merchant to re-authorise via the OAuth consent flow, or fall back to other payment methods. |
The SDK presents its own UI - you don't need to create any payment view controllers or provide a presenting controller. When you call a payment method, the SDK handles all UI presentation over your app.
For the full parameter reference, see SDK reference: RevolutTapToPayKit initialiser.
5. First-time setup (optional)
You can optionally call performFirstTimeSetup to guide the merchant through the initial setup before accepting payments. This method:
- Runs the steps necessary to set up Apple's
ProximityReaderframework for operation, including accepting terms and conditions. - Optionally presents an introduction screen giving a short description of Tap to Pay on iPhone capabilities.
- Gives the merchant an opportunity to run a test payment. The test payment behaves exactly like
performPayment, with a predefined amount of 1 currency unit (e.g., £0.01).
Invoking this method is not required - performPayment and performPayments automatically handle any necessary setup on first use, without failures.
However, running performFirstTimeSetup provides a smoother first-time experience for the merchant by guiding them through the setup explicitly.
tapToPayKit.performFirstTimeSetup(
    shouldShowIntro: true,
    currency: "GBP",
    merchantName: "City Taxi Co.",
    completion: { [self] receipt, result in
        switch result {
        case .success:
            // Setup completed. If a test payment was made, receipt is available.
            if let receipt {
                // receipt.url contains a URL for sharing the test payment receipt
                print("Test payment receipt URL: \(receipt.url)")
            }
        case .failure(let error):
            // Setup or test payment failed.
            print("Setup failed: \(error)")
        }
    }
)| Code | Description |
|---|---|
tapToPayKit.performFirstTimeSetup | Starts the first-time setup flow on the RevolutTapToPayKit instance created in Step 4. The SDK presents the setup UI over your app. |
shouldShowIntro | Whether to show an introduction screen explaining Tap to Pay capabilities. Only shown once - subsequent calls with true won't show it again. |
currency | The currency for the optional test payment (3-letter ISO 4217 code). The test amount is 1 unit of this currency (e.g., £0.01). |
merchantName | Appears on the test payment receipt. |
completion | Called when the setup flow finishes and the SDK's UI has been dismissed. Receives a Receipt (if a test payment was made) containing a url: URL for sharing, and a Result indicating success or failure. |
For the full parameter reference, see SDK reference: RevolutTapToPayKit.performFirstTimeSetup.
6. Receive payments
The SDK provides two methods for accepting payments. Both present their own UI and return results via callbacks.
To receive a single payment for a predetermined amount, call performPayment:
tapToPayKit.performPayment(
    amount: 10_00,
    currency: "GBP",
    description: "Taxi fare - Trip #1234",
    merchantName: "City Taxi Co.",
    onDidCharge: { [self] receipt, result in
        switch result {
        case .success:
            // Payment completed. Receipt contains a URL for sharing.
            if let receipt {
                print("Receipt URL: \(receipt.url)")
            }
        case .failure(let error):
            // Payment failed. Handle the error.
            print("Payment failed: \(error)")
        }
    },
    completion: { [self] in
        // The SDK's UI has been dismissed.
        // Continue with any UI updates in your app.
        print("Payment flow completed")
    }
)| Code | Description |
|---|---|
tapToPayKit.performPayment | Starts a single payment for a fixed amount. The SDK presents the payment UI over your app. |
amount | The payment amount in minor units (e.g., 10_00 for £10.00). Cannot be zero. |
currency | The payment currency (3-letter ISO 4217 code). |
description | Optional. Appears in the merchant's Revolut Business transaction history. |
merchantName | Optional. Appears on the receipt. |
onDidCharge | Called after the payment completes, while the SDK's UI is still on screen. Receives a Receipt (if available) containing a URL for sharing, and a Result indicating success or failure. |
completion | Called after the SDK's UI has been dismissed. Use this to continue your app's flow. |
If the SDK detects that Tap to Pay cannot accept the payment (for example, the customer's card doesn't support contactless), it automatically falls back to a QR code payment method. The QR code payment method cannot be invoked directly.
For the full parameter reference, see SDK reference: RevolutTapToPayKit.performPayment.
7. Handle payment results
Both performPayment and performPayments return results through two callbacks with different timing:
| Callback | When it's called | Use it for |
|---|---|---|
onDidCharge | Immediately after a payment completes, while the SDK's UI is still on screen. | Immediate feedback: updating your POS state, logging the result, or preparing the receipt for sharing. The Receipt object (if provided) contains a url: URL property for sharing. |
completion | After the SDK's UI has been fully dismissed. | Continuing your app's flow - for example, returning to the home screen or presenting the next order. |
onDidCharge: { [self] receipt, result in
    switch result {
    case .success:
        // Payment successful - update your order/POS state
        if let receipt {
            // Present receipt sharing options to the merchant
            let activityVC = UIActivityViewController(
                activityItems: [receipt.url],
                applicationActivities: nil
            )
            present(activityVC, animated: true)
        }
    case .failure(let error):
        // Payment failed - inform the merchant
        showAlert(title: "Payment failed", message: error.localizedDescription)
    }
},
completion: { [self] in
    // SDK UI dismissed - continue app flow
    navigationController?.popToRootViewController(animated: true)
}The onDidCharge closure is for UI updates only. Its delivery is not guaranteed due to network conditions or other issues. You must rely on server-to-server webhooks to get the final, authoritative status of a payment before fulfilling the order.
Implementation checklist
Use this checklist to verify that your Tap to Pay integration is correctly implemented before going live.
SDK setup
- ProximityReader entitlement (
com.apple.developer.proximity-reader.payment.acceptance) added to your Xcode project. - SDK installed via CocoaPods with correct deployment target (iOS 16.4+).
- SDK initialised with the correct
clientIdand.productionenvironment. -
TokenProviderProtocolimplemented and calls your backend for device tokens. -
onLogouthandler implemented (notifies backend or prompts merchant to re-authorise). -
RevolutTapToPayKitinstance stored accessibly (e.g., view model property or shared service).
Payment flow
-
performPaymenttested with a real test amount. -
performPaymentstested with the amount entry UI. -
performFirstTimeSetuptested (optional, but recommended for first-time users). - Payment result handling tested for success, failure, and cancellation scenarios.
-
onDidChargeandcompletioncallbacks handled with correct timing expectations. - Receipt URL sharing tested.
- QR code payment fallback verified (test with a non-contactless card or by triggering a Tap to Pay unavailability scenario).
- Two consecutive unauthorised errors trigger
onLogout(test with an expired or invalid token).
Backend
- Device token endpoint implemented and serving tokens to the iOS app (
grant_type=exchange_token). - Access token refresh implemented (
grant_type=refresh_token). - Webhook endpoint receives and processes payment status events.
You've successfully integrated Tap to Pay on iPhone!
Since sandbox is not currently supported, test with small real transaction amounts and verify they appear in your Revolut Business merchant account.